Activity Editor
What are Activities?
An Activity can combine notes, files, scheduling and team collaboration into a self-contained item. Activities can be used to do everything from managing large projects with large teams to reminding you of lunch plans
Using Activities
Using Activities means that you don’t get bogged down receiving dozens of emails a day because it allows you schedule and manage collaboration within 1to1Core rather than through email threads
Setting up Activities is the way to organize your ongoing tasks, such as meetings, appointments, follow-ups, and so on. Using the Activity Editor you can create private or shared Activities
Activities are a reminder of what you need to handle during the displayed timeframe. Activities sync with Outlook and your handheld device to give you both a view of your day/week/month, and also reminders sent to your device. An Activity allows you to enter a detailed, formatted description of the work required and store any relevant files, and allows you to engage in discussions. When you create an activity, it will automatically appear in your personal calendar, alternatively it can appear in a shared calendar which other team members can access
You can invite users and non-users of 1to1Core to collaborate in Activities. After being added to the Activity in the Activity Editor, attendees are automatically emailed an Outlook appointment as well as a link directing them to the Activity Space for that activity. If the attendee is a 1to1Core user, the Activity will also appear in Zone as an Activity and in their Calendar
Note: Calendar sync works in one direction only, from the 1to1Core Calendar to Outlook.
When adding or editing an activity you will be using the Activity Editor. From here you can modify the details of your activity and invite attendees. Once you have saved your activity you can also add files and discussion posts. Track your activity via the Log to see who is making changes to your activity.
Users on the Attendee list will get the activity in their Zone or To_Do list and use all the functions of the activity.
When you invite regular contacts to your Activity, they can share in the collaboration through the emailed a link and Outlook appointment directing them to join what we call a "MeSpace". The "MeSpace" allows them to read the notes, download the files added to the activity, and reply with the discussion feature.
How to Add an Activity:
1. On the left hand menu tab click My Office below Dashboard to display a page where Zone gadget is located
2. Click on  icon to display the following drop down
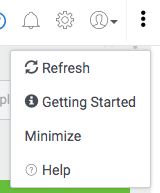
Select add Activity option from the drop down list
3. The Activity Editor page is displayed as shown below
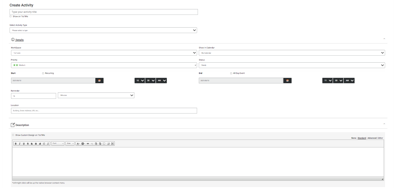
4. Enter all the details of your activity
- Start and End: Activities can be set in the future, such as a "meeting starting next week from 9am to 10am" This date will be used to filter what displays in your Zone and where on the Calendar
- Recurring: Opens more options to make this activity repeat
- All Day Event: Not time specific, just dated
- Reminder: An email reminder will be sent at the set period before the Start date
- Location: Could be an address or a URL for an online meeting
- Priority: Will be sortable in the Zone and ToDo lists
- Status: Ready is the default, but can be changed to Completed or Dismissed to hide the activity from your Zone and ToDo lists
5. Select Activity Files to add files or images or screen shots which can be viewed by all the participants to the activity
6. Select Activity Contacts to invite others to your activity. You can search for contacts or quickly Add New contacts right from here
7. Select Process Flows if you want to attach a task to the process
8. When you have finished, click either Save at the bottom of the gadget which will send an email notification to all attendees of the activity or Save (No Notifications) which will only update the activity and display on The Wall instead of sending an email notification to all the attendees
9. You will be returned to where you came from and the new Activity will be added to your Zone or “To Do” list depending on the option you chose when editing the activity
How to Edit an Activity:
You are automatically the owner of all activities you create; however you can change ownership within the Activity Editor. Depending the Roles and Permissions the user has, editing the activity can be restricted to other attendees
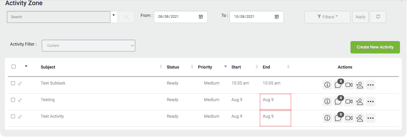
- Select the Activity you wish to edit in the Zone. It will be highlighted in yellow
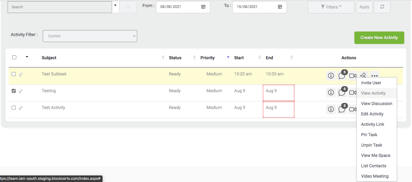
- Select Edit Activity from the drop down menu. This will bring you to the Activity Details
- You must click Save or Save (No Notifications) to retain your changes. To discard your changes, click Close
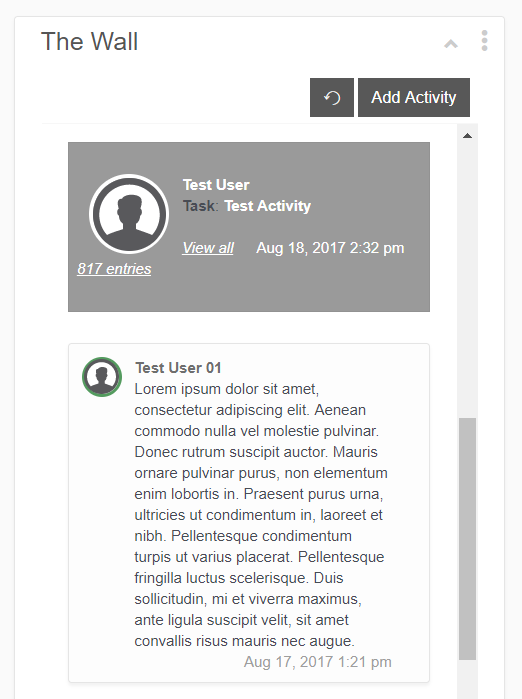
When you are part of an activity, then to interact with other members of the activity, you need to contact through messages. And these messages are called Discussions which need to do on a daily basis with the other members. To post a discussion;
- Select the Activity in which you want to send out an update. A drop down will be displayed
- Select View Discussion to display the following
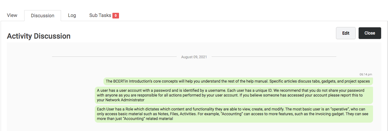
- Type in the required content in the text box as shown in the screenshot below and click
 button to send the post to all the members / attendees to the Activity
- Select
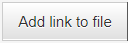 if you wish to link a file to this Activity
 - Select
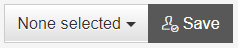 if you wish to assign responsibility of this activity to an attendee in particular. The None Selected is a drop down which when clicked will display all the attendees assigned to this Activity. Choose one and click
- Select
 if you wish to add a file or make changes to the Activity
 - Select
 if you wish to return to the Zone
Log
Log provides you with the history of the Activity, giving you details related to viewing or modifications done to the activity by the attendees assigned to that Activity.
Edit Sub Tasks
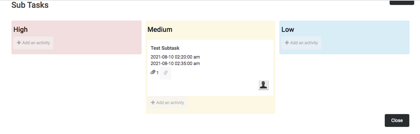
Sub tasks are created to link one master Activity with multiple mini-tasks. If you wish to assign minor tasks related to the same activity this Sub tasks tab next to Log can be used. This will help you to track all tasks related to an Activity in one place
- Select Sub tasks tab if you wish to create sub-activities for the main Activity. Refer to the screen below
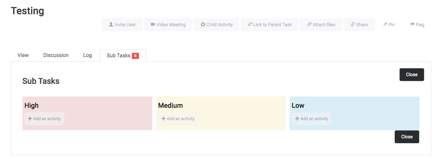
- Depending on how you wish to prioritize the tasks, choose from High, Medium or Low.
- Select +Add an activity to create an activity as shown below
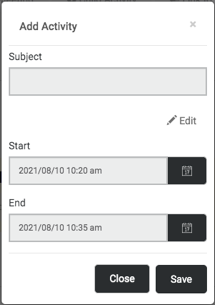
Once all the required information is entered, click and create the sub activity as shown below
Select to close the Add Activity window and return to the previous page
- If you wish to create another sub activity, select +Add an Activity again and repeat the above steps
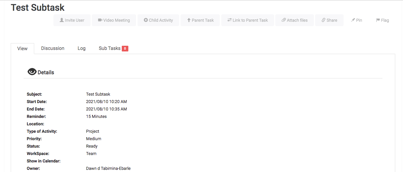
- If you wish to view the newly created Sub Task click on the name of the sub-task.
Create an Existing Task as a Parent Task
If you want to make an existing activity task as a Parent Activity Task, this feature can be used. For this first select an activity that you would like to make as a Parent task as shown below
Click on an activity to display a drop down as shown below
Select View Activity to get to the following page
You will notice two icons  and
and  next to file attachment link on the top right hand corner. This icon is used to Edit the Parent Task Relation and this icon when clicked will get highlighted if it is a Parent Task and take you to the parent activity
Click on  icon to display the following Copy Link window as shown below
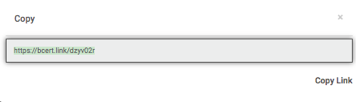
Copy this link by choosing Ctrl+C on the keyboard or by selecting the link and right clicking on the highlighted link to display a drop down from which you can select Copy, which will copy the link. Now Close the window and click  to return to the Zone as shown below

Select another activity for which you want to make the copied activity as the Parent by clicking on the activity and selecting View Activity to display the following page

Click on icon to display the following window
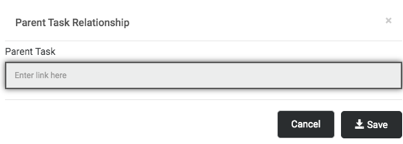
Paste the link in the text box below Parent Task and click on one of the following
 - This button will close the window and return to the previous page without making any changes
 - This button when clicked will make the necessary changes and return to the previous page
Once it is saved, click on button and return to the Zone. Select the activity that you had just made as the Parent Task by clicking on the activity and selecting View Activity from the drop down list to display the following

You will notice that the Sub Task which was displaying “0” previously is now displaying “1” which indicates that this is the Parent Task.
You can use add more Sub tasks to this parent task by referring to Create Sub Task section of this help manual