Raise a Workflow Ticket
Raising a workflow ticket is a way to initiate a request or task within a system or software application used to manage workflows and processes. When you raise a workflow ticket, you can easily track and manage your request from start to finish, ensuring that it is handled efficiently and effectively.
This guide walks you through the steps of raising a workflow ticket.
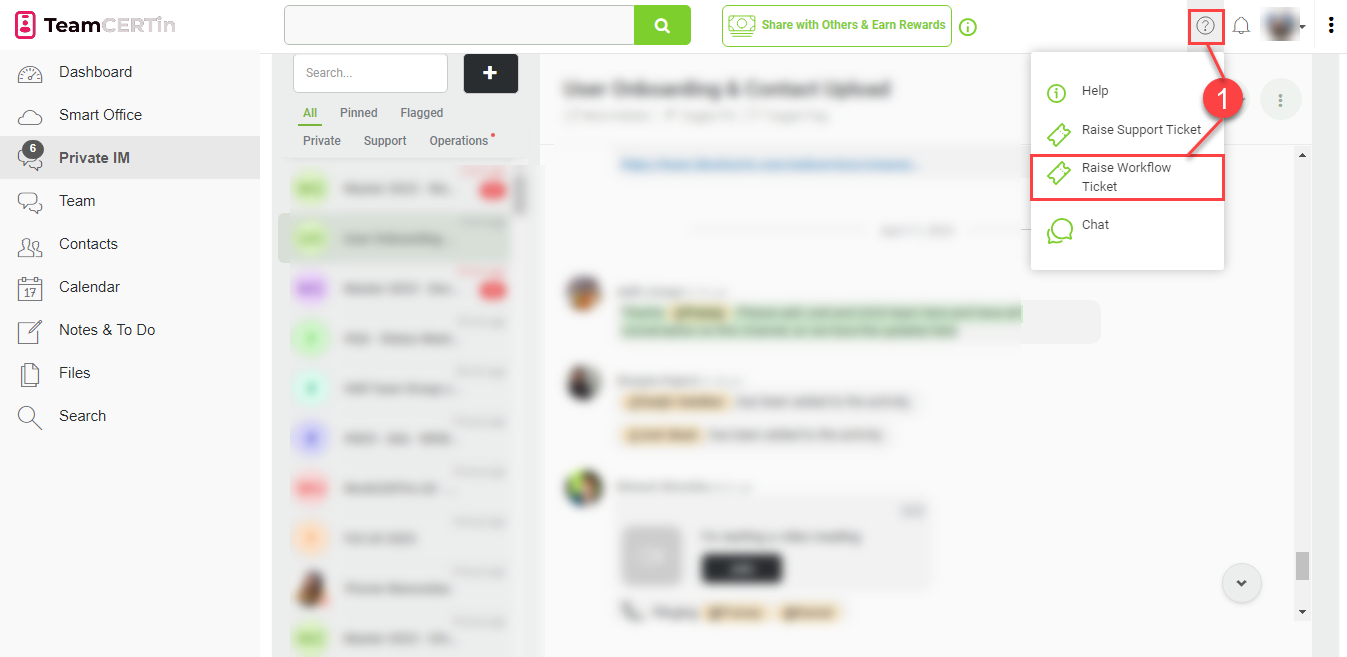
- Start by clicking on the question mark icon in the upper-right corner and select Raise Workflow Ticket.
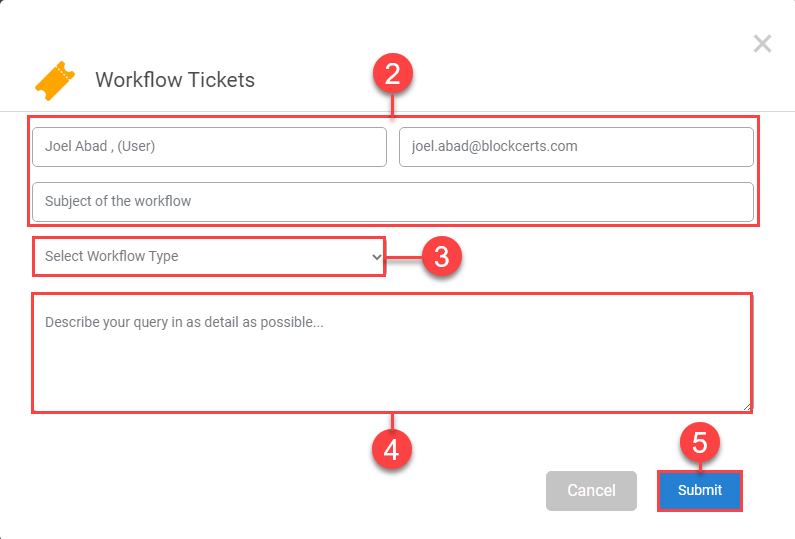
- Type in your Full Name, Email Address, and Subject of the Workflow (Task Details). Be sure to provide accurate and specific information.
- Click on the dropdown list and select the Workflow Type that corresponds to your department. Note that the workflow type is crucial, as it ensures that your ticket gets assigned to the right team.
- Enter a detailed description of your task. Add the main project URL (project where the task was assigned)
- Review your information and click Submit once everything looks good. The submission confirmation message will be displayed letting you know that your ticket has been successfully created.
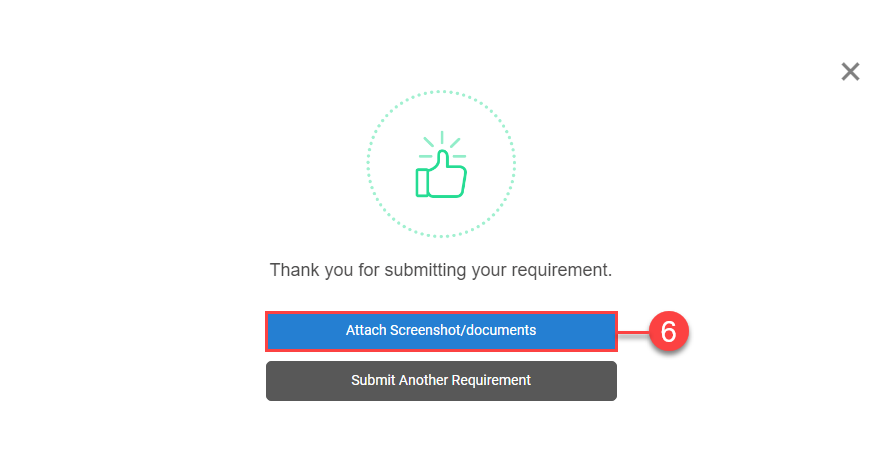
- If you have any relevant screenshots or documents to attach to your ticket, click on Attach Screenshot/documents.
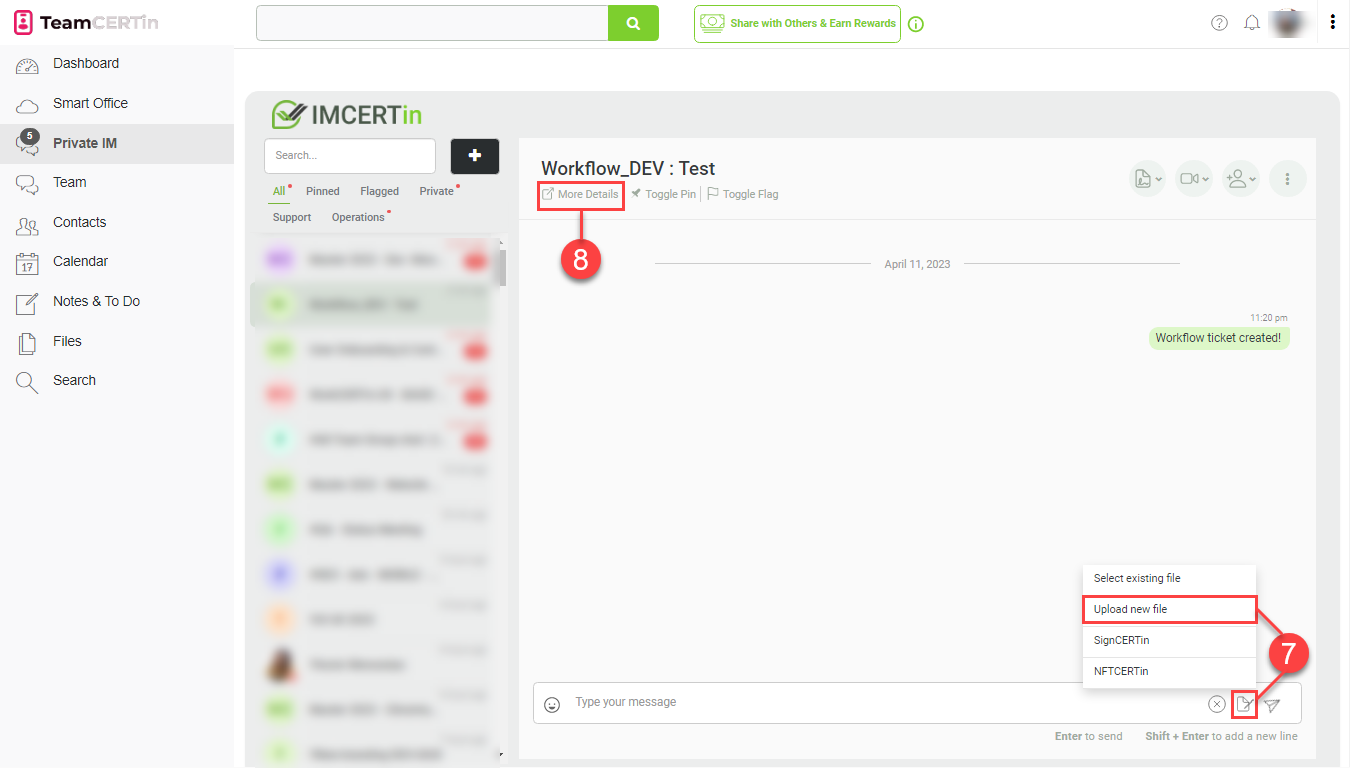
- You will be redirected to the Private IM of your created workflow ticket. To attach files, click on the paper and pen icon, select Upload new file, and follow the prompts.
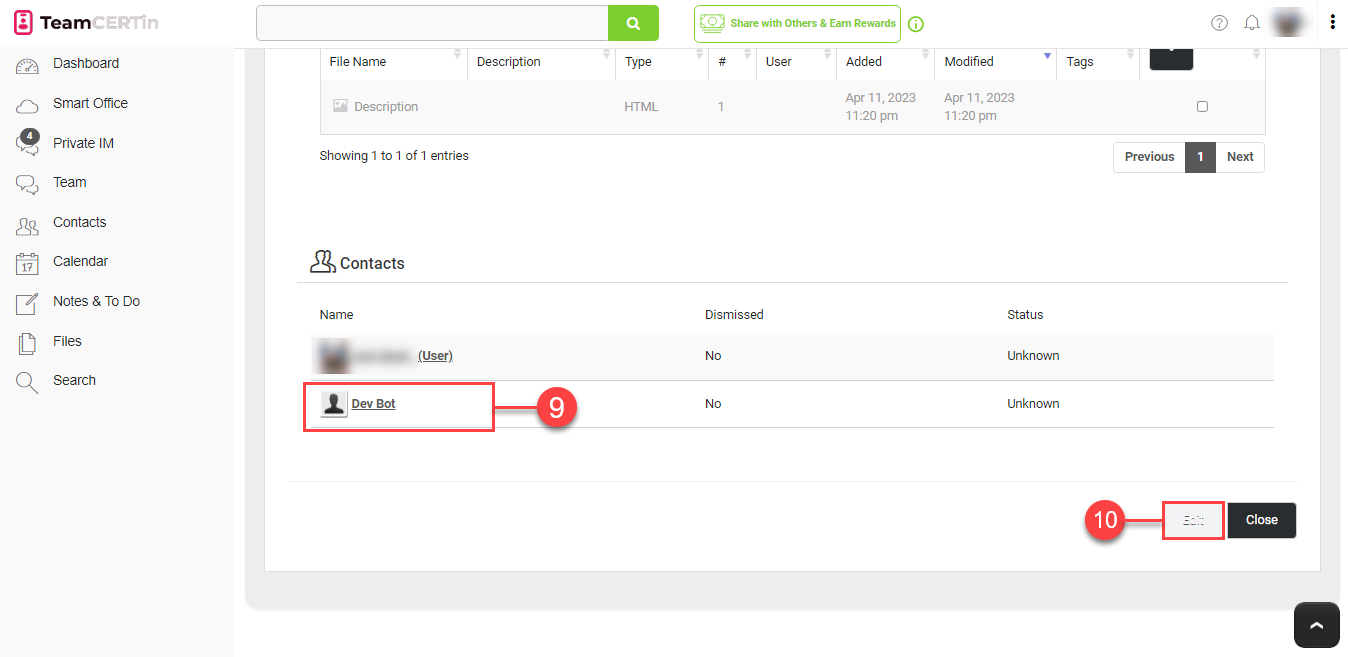
- If you want to view the details of your workflow, click on More Details.
- In the Contacts section, you will see that your ticket has been assigned to the respective department bot. For example, if you’re in the Development department, your ticket will be assigned to the Dev Bot.
- Click on the Edit
- In the Details section, specify the Start Date and End Date (Planned End Date). Then change the Status to ‘In Progress’ to indicate that the task is being worked on.

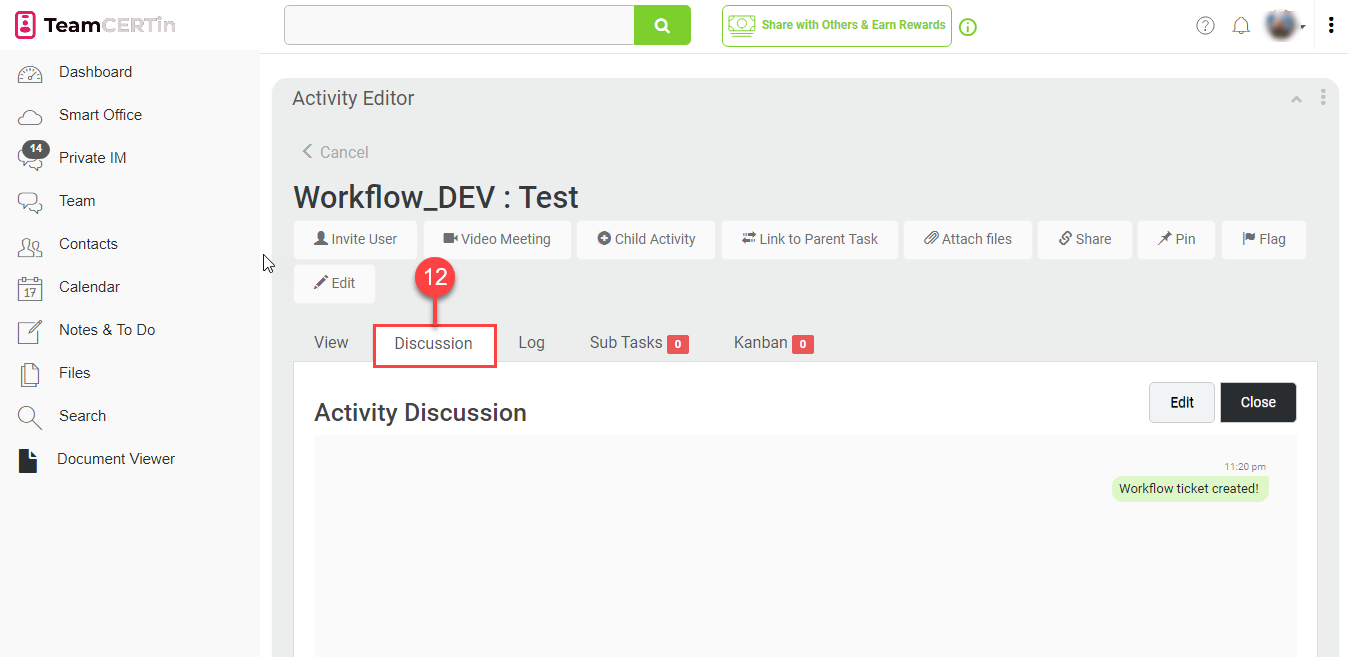
- Click on the Discussion
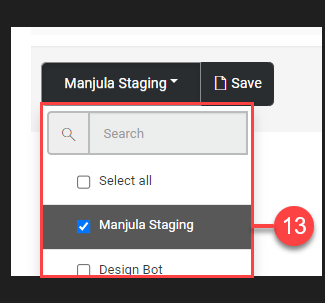
- In the lower-left corner of the Activity Discussion window, select your name from the dropdown list to assign the workflow ticket to yourself.
- All discussions will happen on the main project channel.
- On completion of the task the workflow ticket is marked completed and communicated to PMOs in the main project channel. PMOs to update the Kanban.
- When a team member completes the task and wants to assign it to the next team member of the next department, mark the original ticket as completed and create a new ticket for the next department.
- All reports on workflow tickets will be extracted using the existing workflow reports.
- Leads can log in to the department BOT login and check the tasks assigned to their department. They can distribute the workflow tickets to their team members by adding relevant team members.