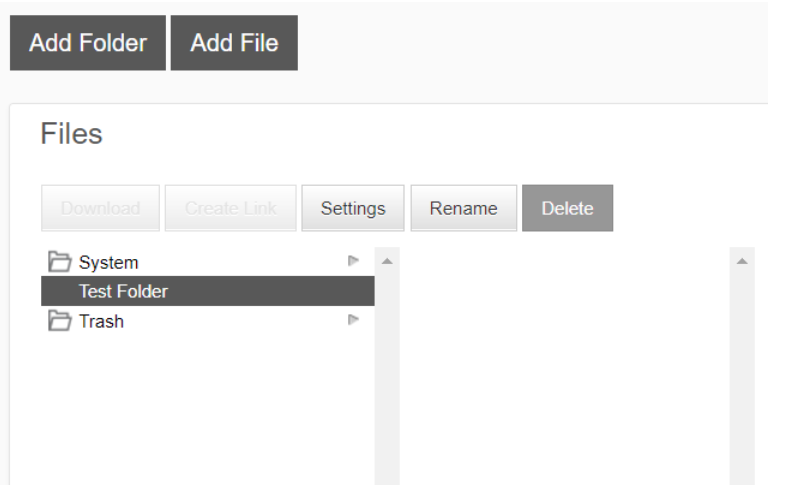
Files
Manage resources through the Files tab. Use folders and permissions to keep your file system organized and secure. Share files with anyone by creating links and attaching to emails.
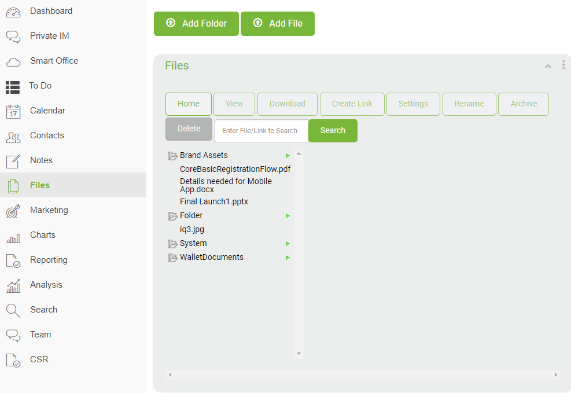
Use file versions for collaborating and maintaining history of the changes done to the files and keeping everyone up to date.
Add Folder: Create folder by clicking on 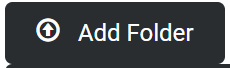
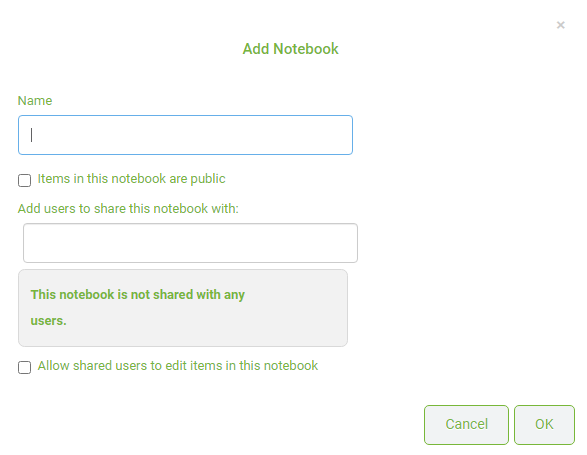
Type in the Folder name and then click one of the following
 - this button when clicked will discard all the changes and return to the previous page
 - this button when clicked will save the changes and create a new folder. Please, see below screenshot for regerence:
Add File
To add a file to a folder, select the folder and then click on  button to display the following
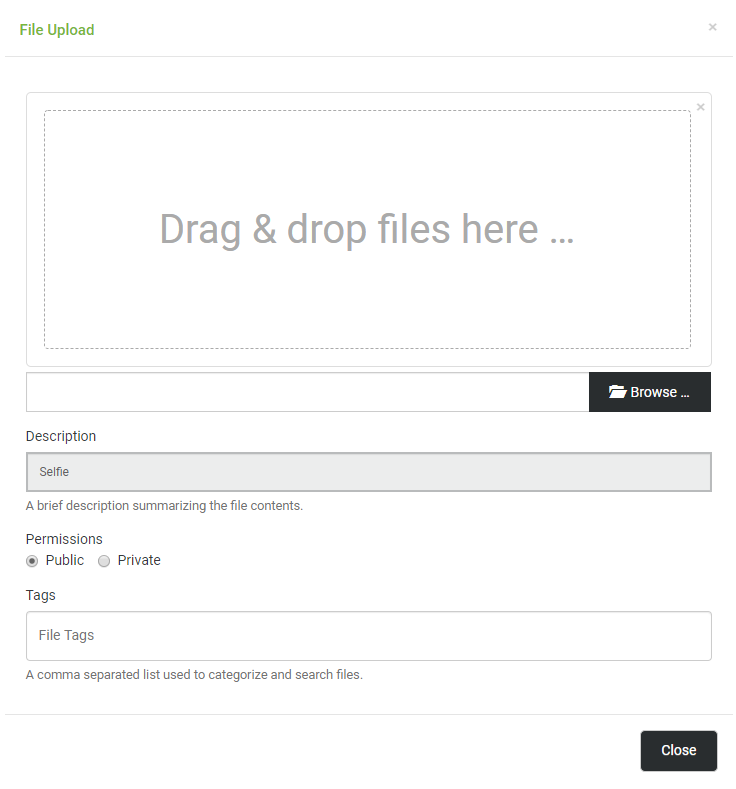
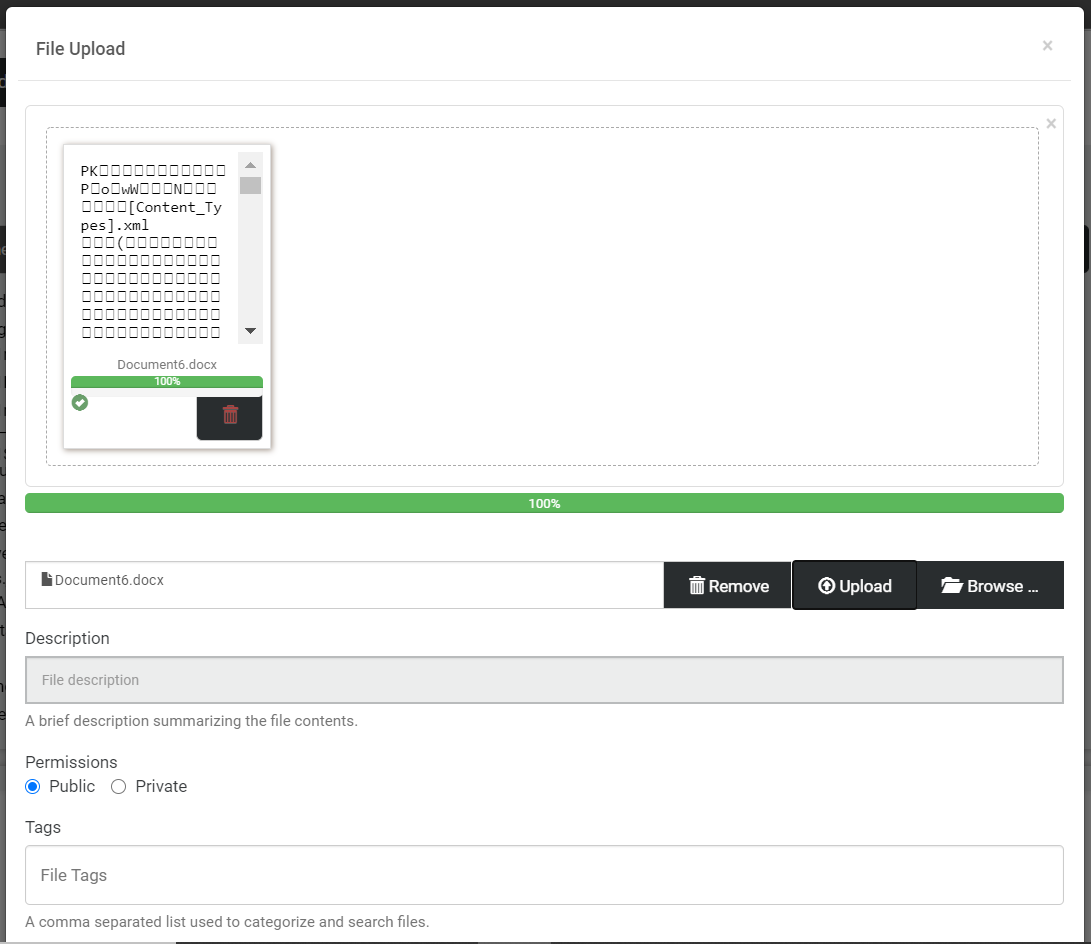
Here you can either open Drag and drop file or click on  button to select a file and upload it here
Type in the Description for the selected file
Select the Permissions by clicking on one of the radio buttons next to Public or Private
Type in any Tags for the file if required
See below the File Upload window with all filled in information
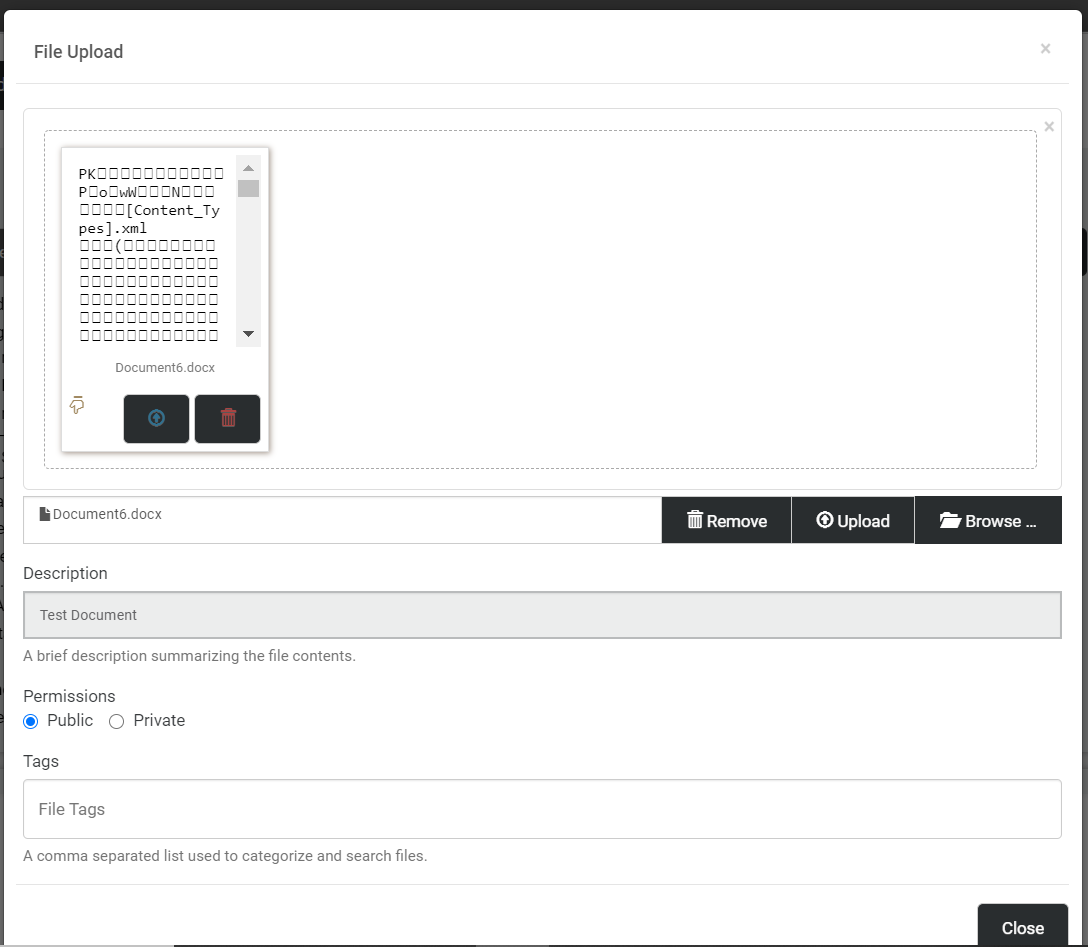
You will notice that the image of the selected file is displayed on the top and two buttons  and
and  are displayed next to button
Click button to upload the file as shown below
The window indicates that the file has been uploaded 100%. Click  button to return to the previous page. You will notice that it creates a file in the next column as shown below
View File: Use the  button to download a file to your computer. Once downloaded the file can be viewed.
The  button will be visible only after a file is selected.
You can then download the file and view its contents.
Create Link
To create a link by click on  button to display the following
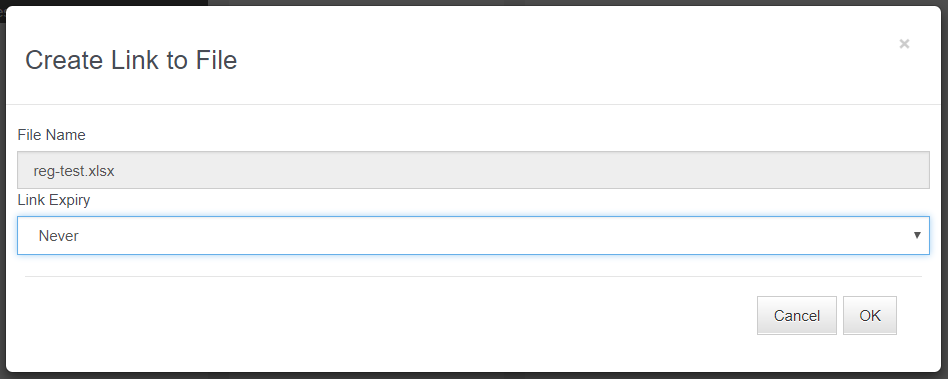
Set an expiry time limit to keep those links from floating around for too long. Once this is done, do one of the following
 - this button when clicked will discard all the changes and return to the previous page
 - this button when clicked will create a link and display the following
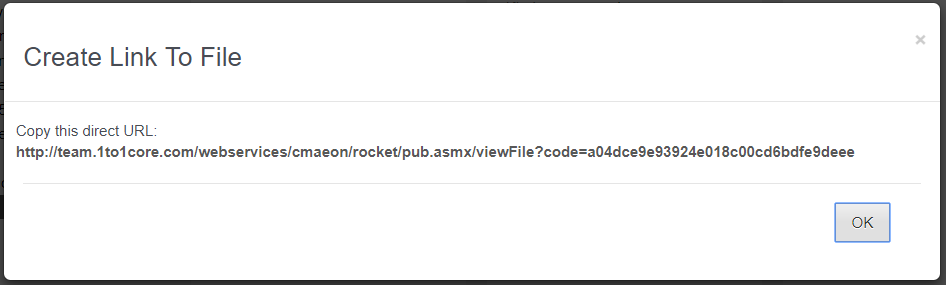
Click  to close this window and return to the previous page
Settings
To make changes to a file’s settings first select the file. Then either click  below Files or click
  to change settings like who created the file, by, edit the Description of the file, update the file versioning, and add Linked Contacts. When you link a contact the file will appear in their contact record. This is also a place where you manage the access. Refer to the illustration below
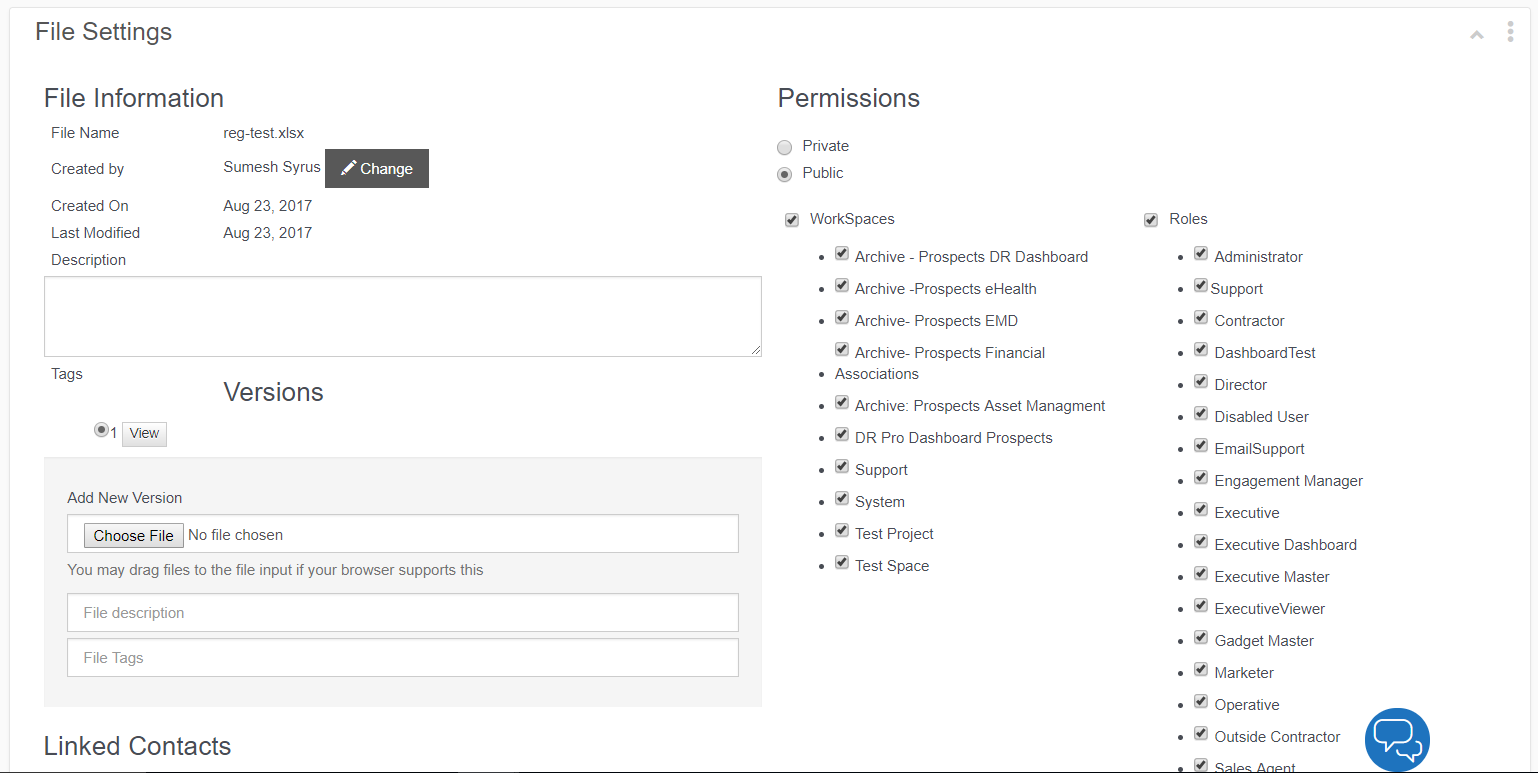
Versions: Add a new version of your file by clicking Browse/Choose File button and uploading it onto 1to1Core. You can always revert to a previous version by clicking the circle next to the desired version. Links will always pull the latest version

Once all the required changes are done, do one of the following
 - This button when clicked will discard any changes and return to the previous page without making any changes
 - At any point of time you want to delete a file, this button can be clicked with the file or the one displayed next to button on the File Management main page
 - This button when clicked will save the changes and return to the previous page
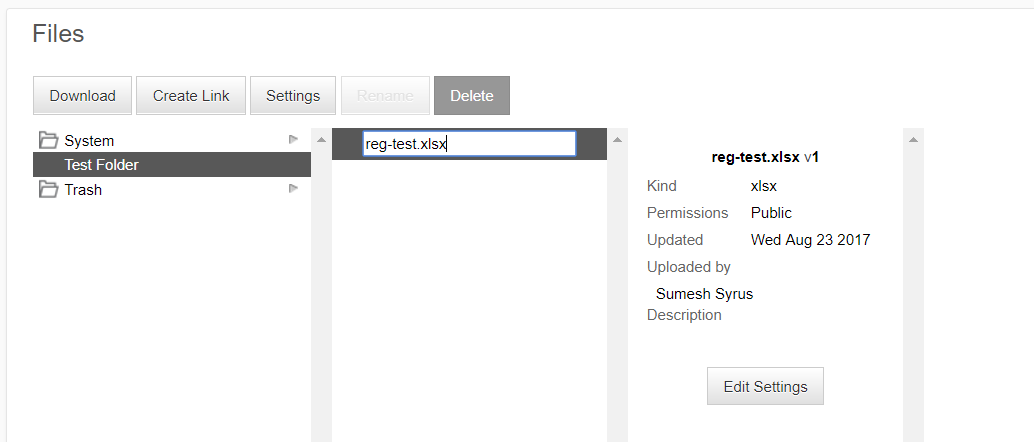
Rename a File
You can rename a file by selecting the file and then clicking on  button. This will convert the selected file to a text box where you can make the necessary change to file name and click outside the text box to save the file. Refer to the screen shot below