Automatic Drive
BCERTin's Automatic Drive gadget sends a string of campaigns automatically based on specific conditions.
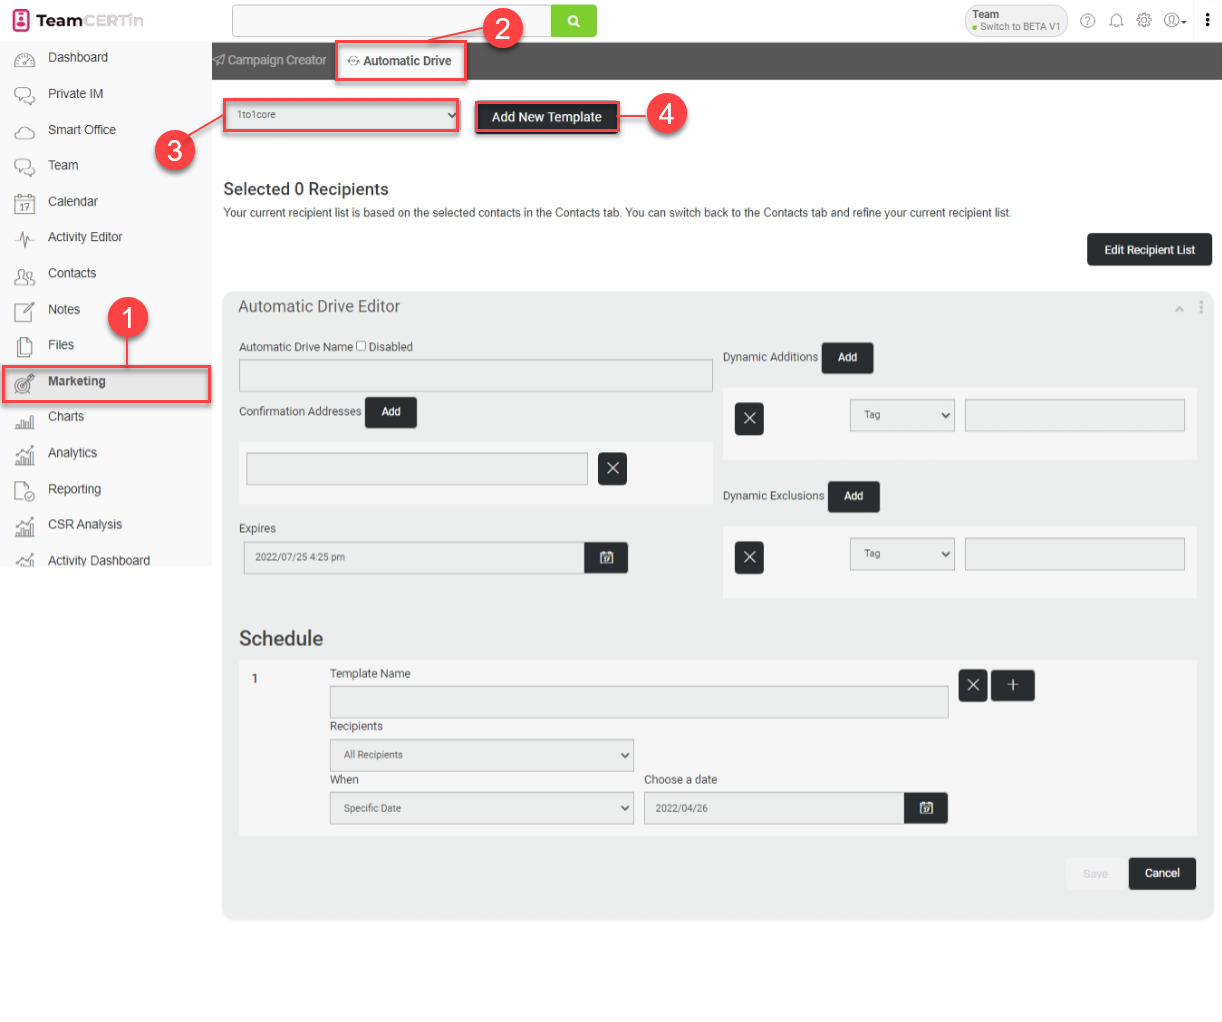
- On the left-hand panel, select Marketing.
- Click on the Automatic Drive tab.
- Choose a Workspace. This will determine what campaigns you have access to later. You may receive a message saying there are no Automatic Drives yet in this project space. Click OK to confirm.
- Click on the Add New Template button to activate the Automatic Drive Editor.
Requirements for using the Automatic Drive
- User role access to tab
- Pre-created Campaigns
- A Send list
Plan out your send
You can save a lot of time by planning it all out before creating an automatic drive.
- Using groups, favorites, or a search, craft the list of recipients.
- Plan out what to send to the contacts who open your initial email, click links within, or leave it unopened. This will become easier as you learn what tools are available with Automatic drives.
- Design and write all the campaigns that you would like to send.
- Create a new Automatic drive and set the conditions.
Set the Conditions
You can save a lot of time by planning it all out before creating an automatic drive.
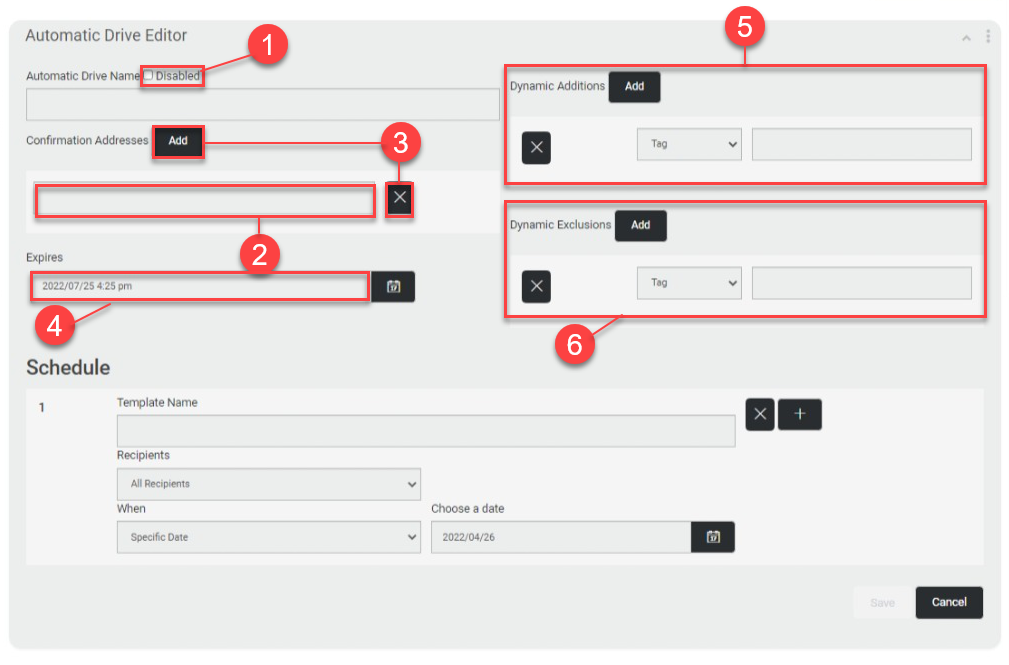
- While planning and setting up the Automatic Drive, keep it "Disabled" with the checkbox to prevent a premature send.
- Enter the Email Addresses to be used for confirmation purposes in the Confirmation Addresses section.
- If you would like to add an email address or addresses, click Add. Otherwise, click the X button to delete the unnecessary email address or addresses.
Click Edit Recipient List and follow the process described within the Campaign Creator online help article to select the recipients to associate with the Automatic Drive. - Use the Expires field to set an expiration date for the Automatic Drive. The system sets an expiration date for an Automatic Drive at 3 months from the time of its creation. You can modify that date using the calendar icon to select a different date and the time list to select a different time.
- In the Dynamic Additions section, you can add contacts that are important to a Campaign and its Automatic Drive by selecting their tag from the Tag list. For example, you might want only VIP leads to receive a campaign such as “Come see our exclusive properties.” In that case, you would select the VIP tag from the Tag list.
- In the Dynamic Exclusions section, you can exclude contacts who you might not want to include in the Campaign by selecting their tag from the Tag list. For example, you might be running a Campaign such as “10 %0ff”, or “Free Shipping” and not want to bother Contacts you have tagged as VIP, so you would select the VIP Tag from this Tag list to exclude them.
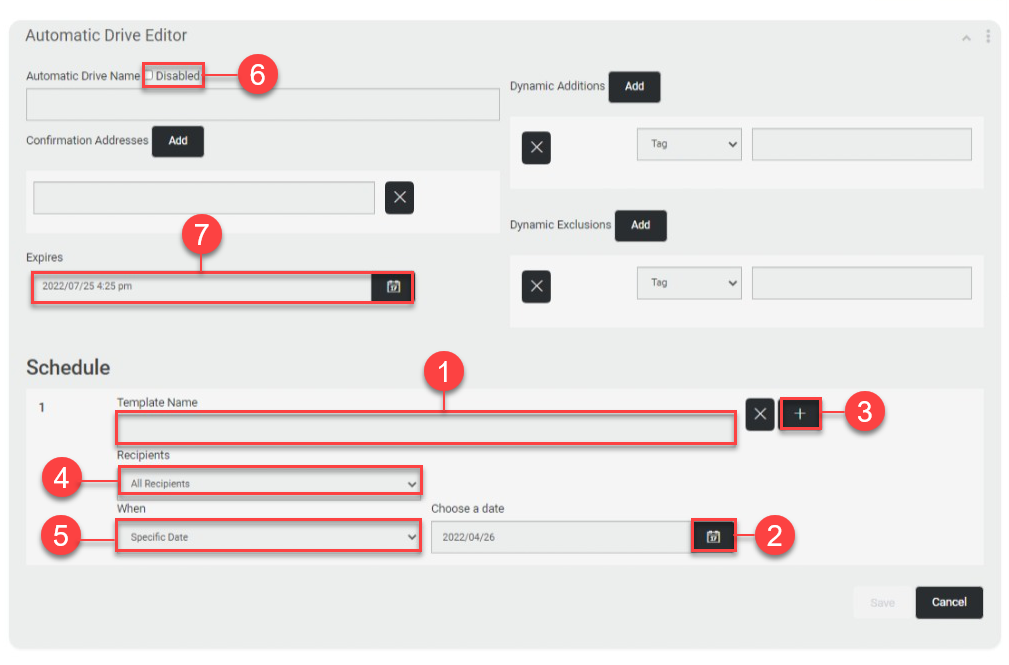
- In the Schedule section, enter a name for the first step's template in the Template Name textbox.
- Use the Calendar icon to enter a Start Date for the Automatic Drive Template in the Start Date text field, if necessary. Warning: The date that you are creating the Automatic Drive is selected by default!
- Click on the + symbol to add another step to the Automatic Drive.
- Notice the "Recipients" is no longer grayed out in the new step. There is also the dropdown "From Step 1". This is how you create multi-layered automatic drives, with many steps linked to a previous step and so on.
- Use "When" to set the date of your sends. "Choose a Date" may change to a "How many days after..." field depending on your selection.
- To turn off the Automatic Drive, select the Disabled checkbox above the "Automatic-Drive Name" field to deactivate it.
- Use the "Expires" field to set an expiration date for the Automatic Drive. The system sets an expiration date for an Automatic Drive at 3 months from the time of its creation, you can modify the date using the Calendar icon to select a different date and the Time lists to select a different time.