Calendar
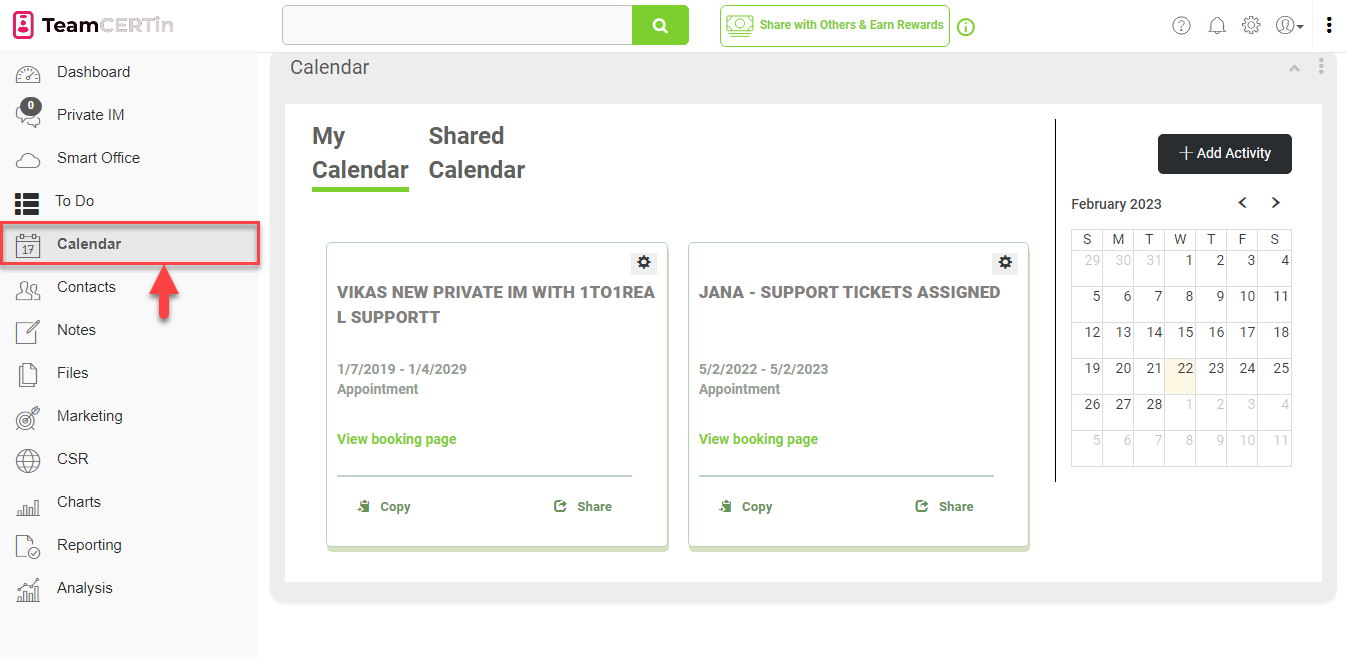
The Calendar gadget displays the date and time on which your meetings, assignments, project deadlines, and other appointments are scheduled.
You can access it by clicking on Calendar on the left-hand panel of your platform.
Two Types of Calendar
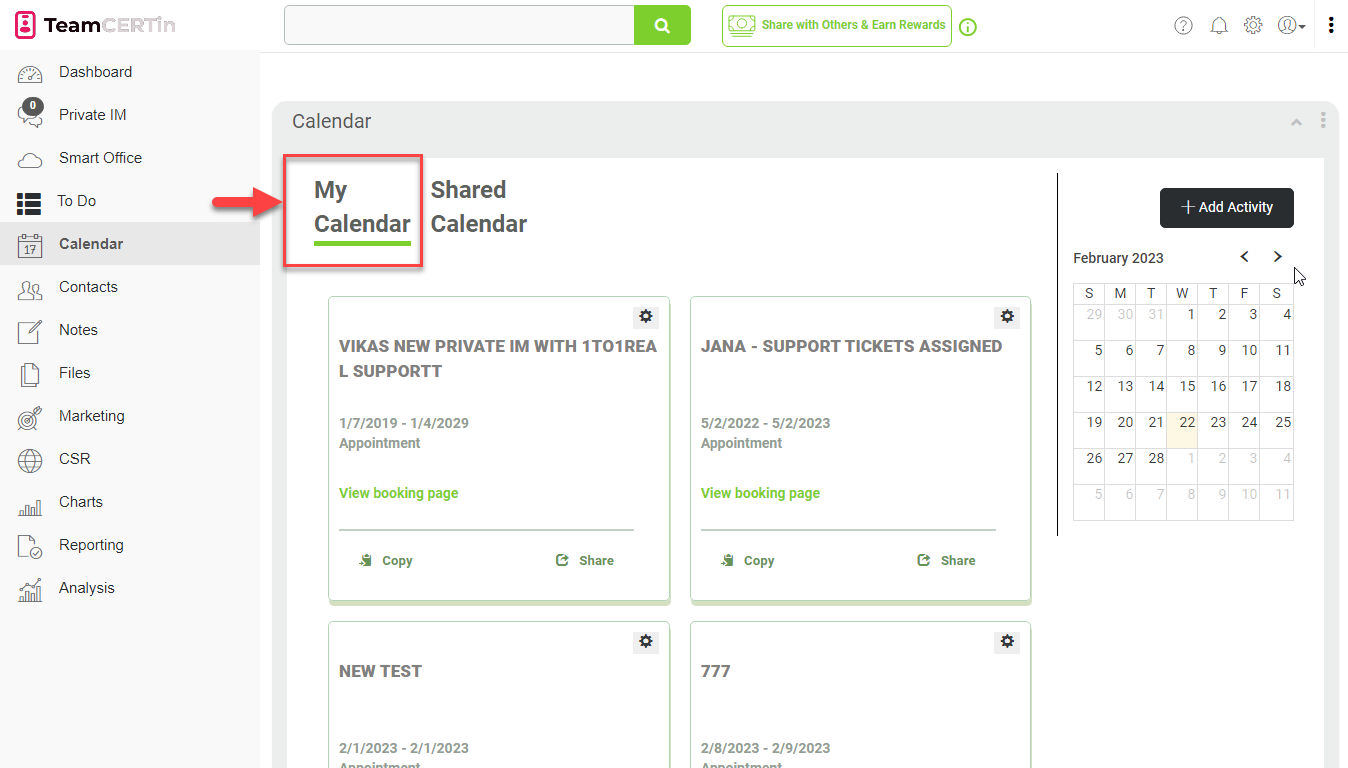
My Calendar refers to your personal calendar and displays all activities that you have created, such as work meetings, appointments, birthdays, and other personal reminders. This type of calendar is often used to keep track of your schedules and manage your personal time effectively.
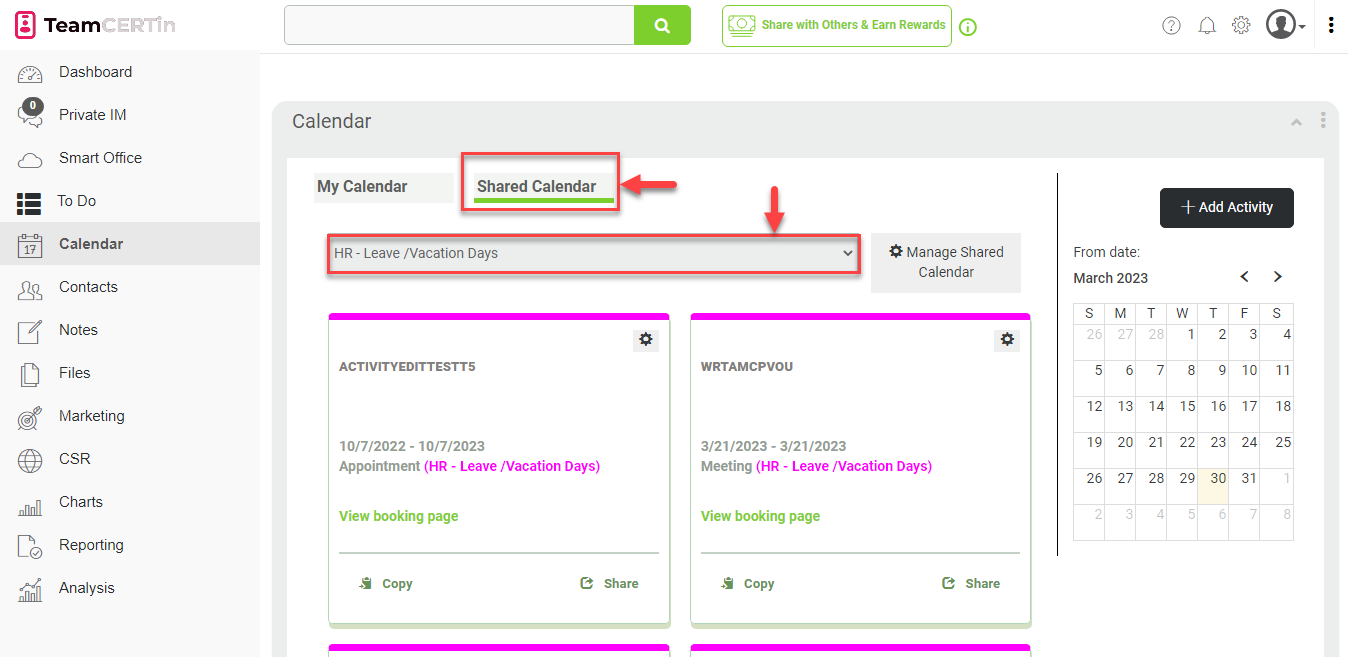
Shared Calendar is a calendar that is shared among multiple users. If someone has granted you permission to view or edit, it will appear under this tab. This can be useful for coordinating schedules, meetings, events, and other activities among team members.
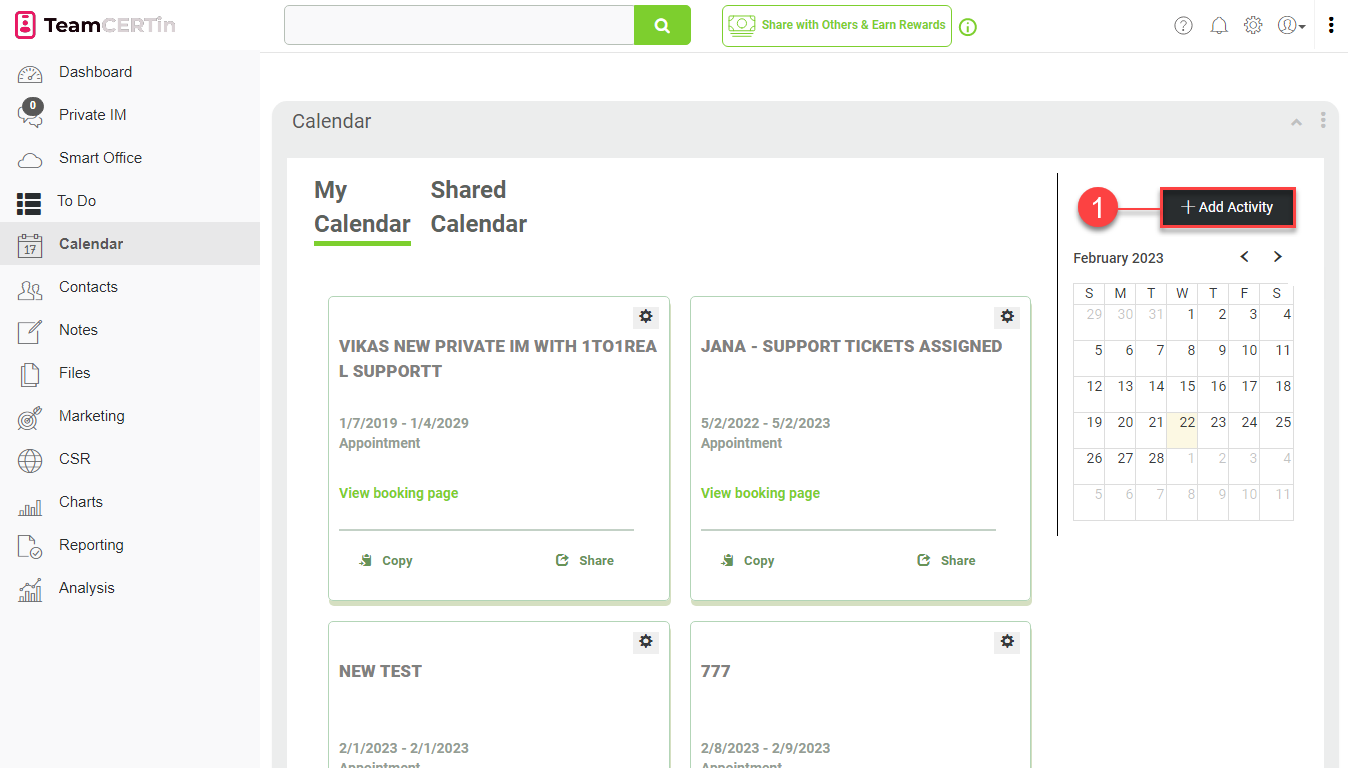
Create A New Activity
To add new activities to your calendar, including appointments, meetings, one-time or recurring events, and more, here are the steps to follow to get you started.
- If you want to create a new activity on your calendar, click on Add Activity.
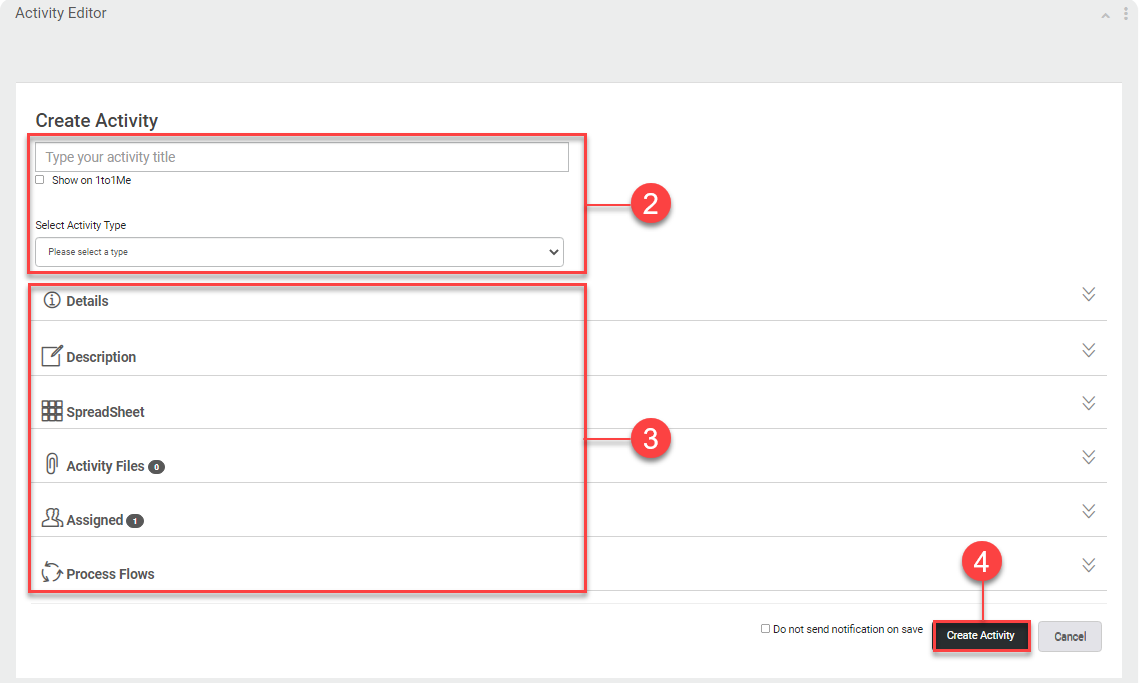
- Enter the Activity Title and select the Activity Type.
- Provide other information, if necessary:
- Details
- Description
- Spreadsheet
- Activity Files
- Assigned
- Process Flows
- Once you are finished, click Create Activity.
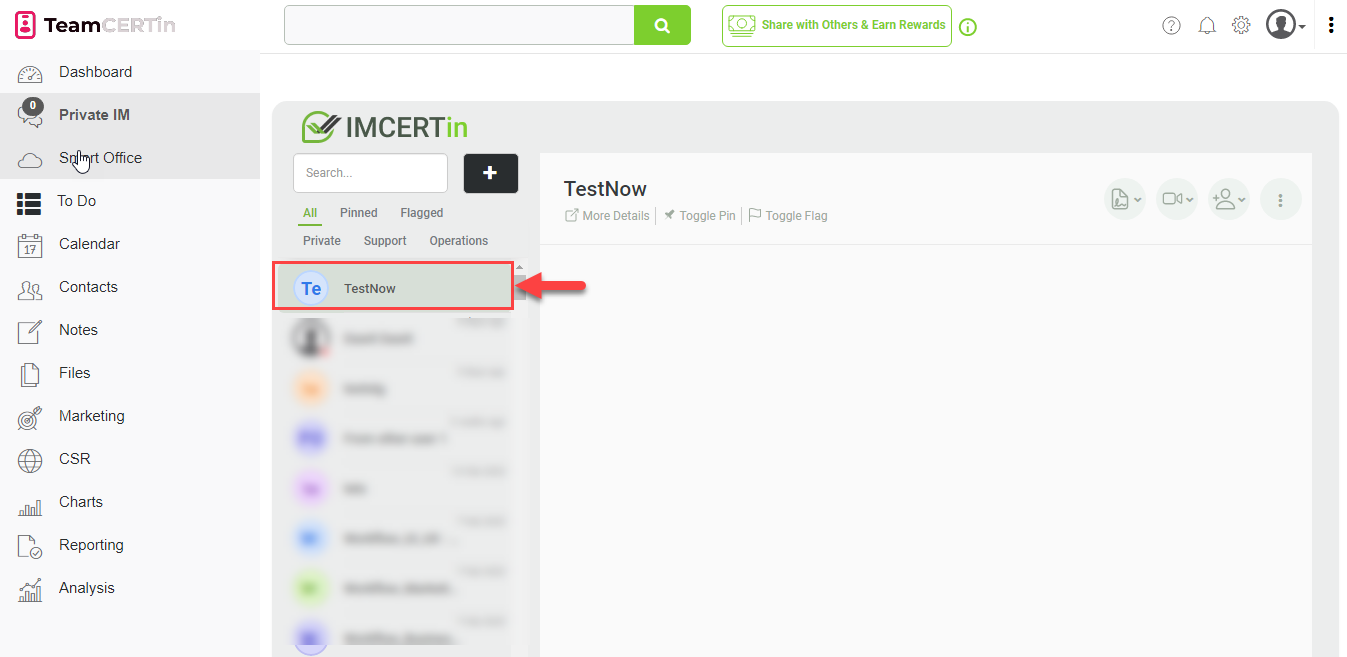
- The created activity will now be displayed in the Private IM list.
Edit/Delete an Activity
In this section, you will be guided on how to make changes to your calendar by editing or deleting activities that you have previously created.
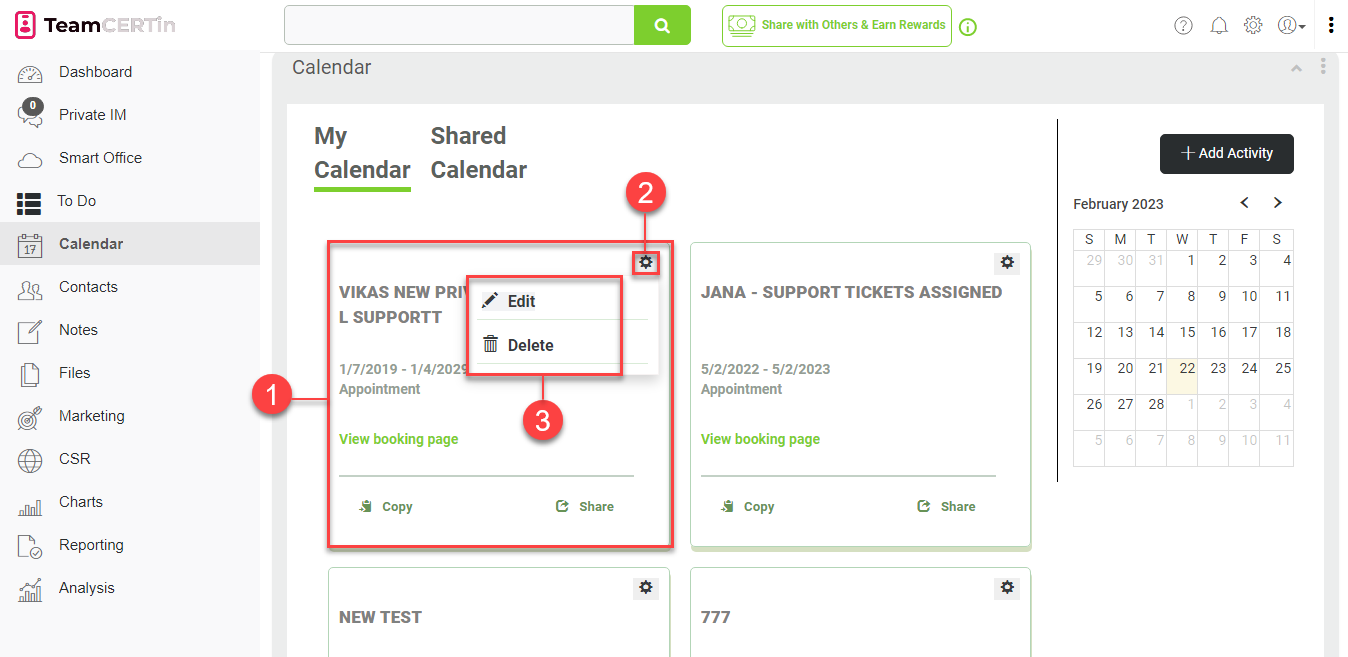
- Select the activity you wish to edit or delete.
- Click on the cogwheel icon.
- Choose Edit or Delete.
Edit an Activity
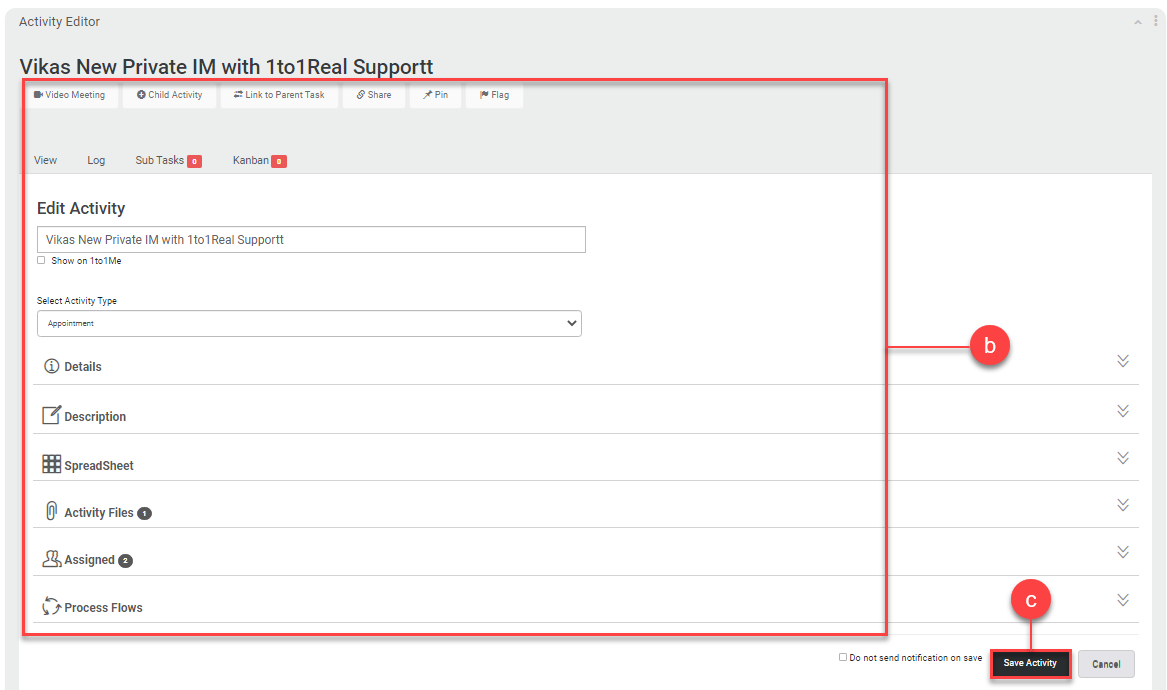
- To edit an activity, choose Edit.
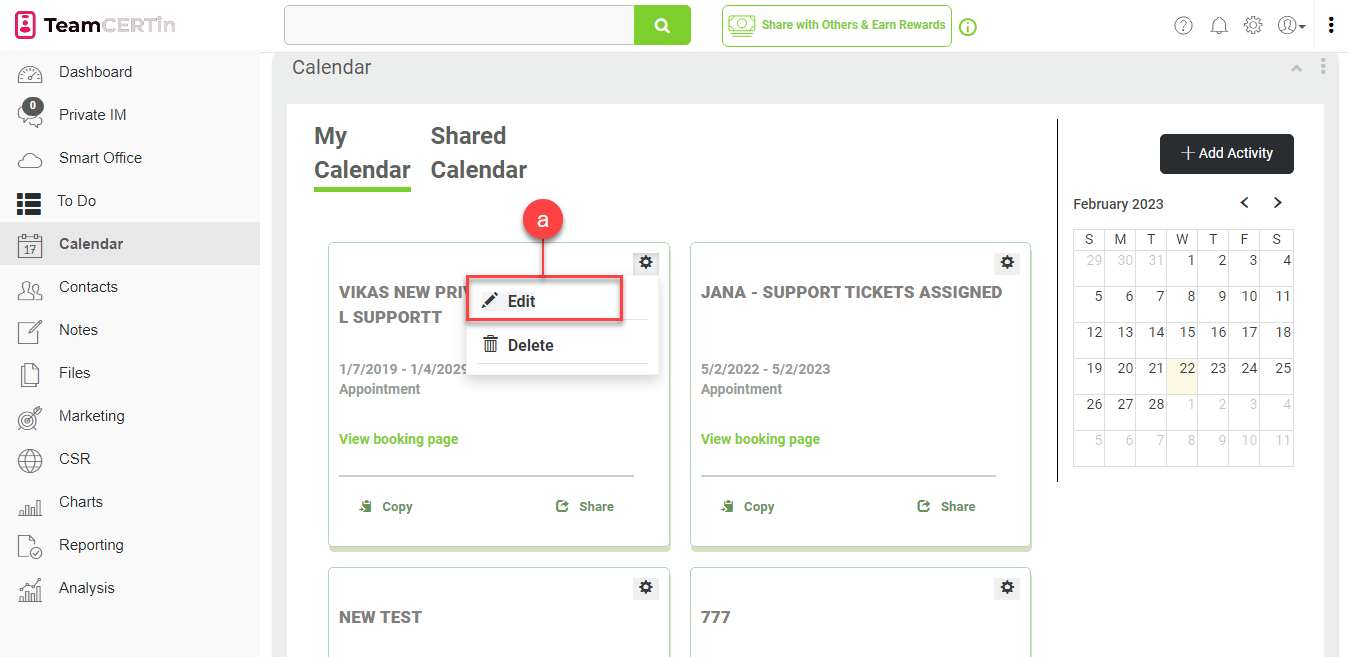
- You will be redirected to the Activity Editor where you can do the necessary edits on Activity Name, Activity Type, Details, Description, Spreadsheet, Activity Files, Assigned, Process Flows, Sub Tasks, Kanban, and others.
- Once done, click on the Save Activity button.
Delete an Activity
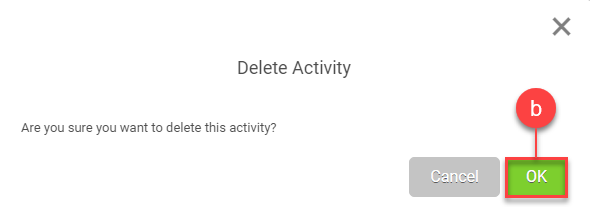
- To delete an activity, choose Delete.

- Confirm by clicking on the OK button.
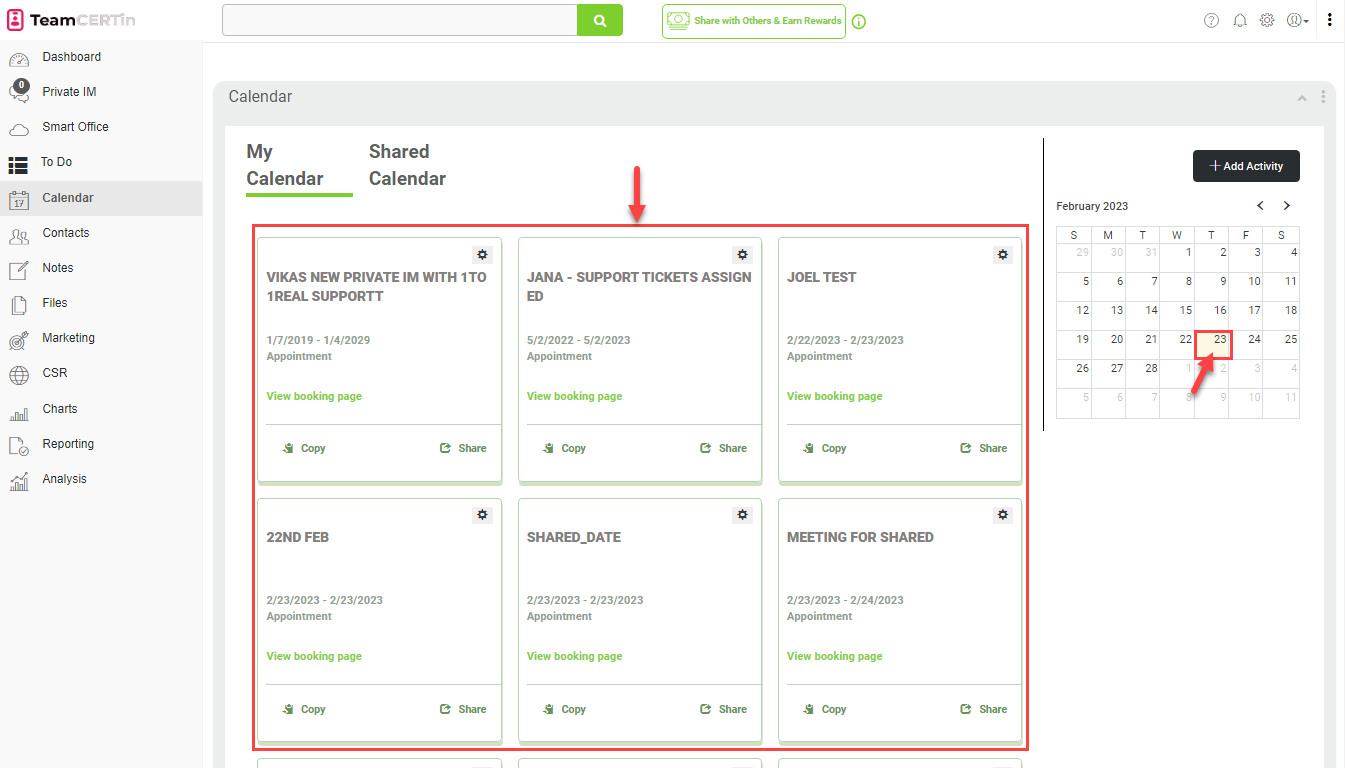
My Calendar Based on a Selected Date
Quickly view, list, or filter all the activities scheduled on a specific date in the My Calendar tab by clicking on a date.
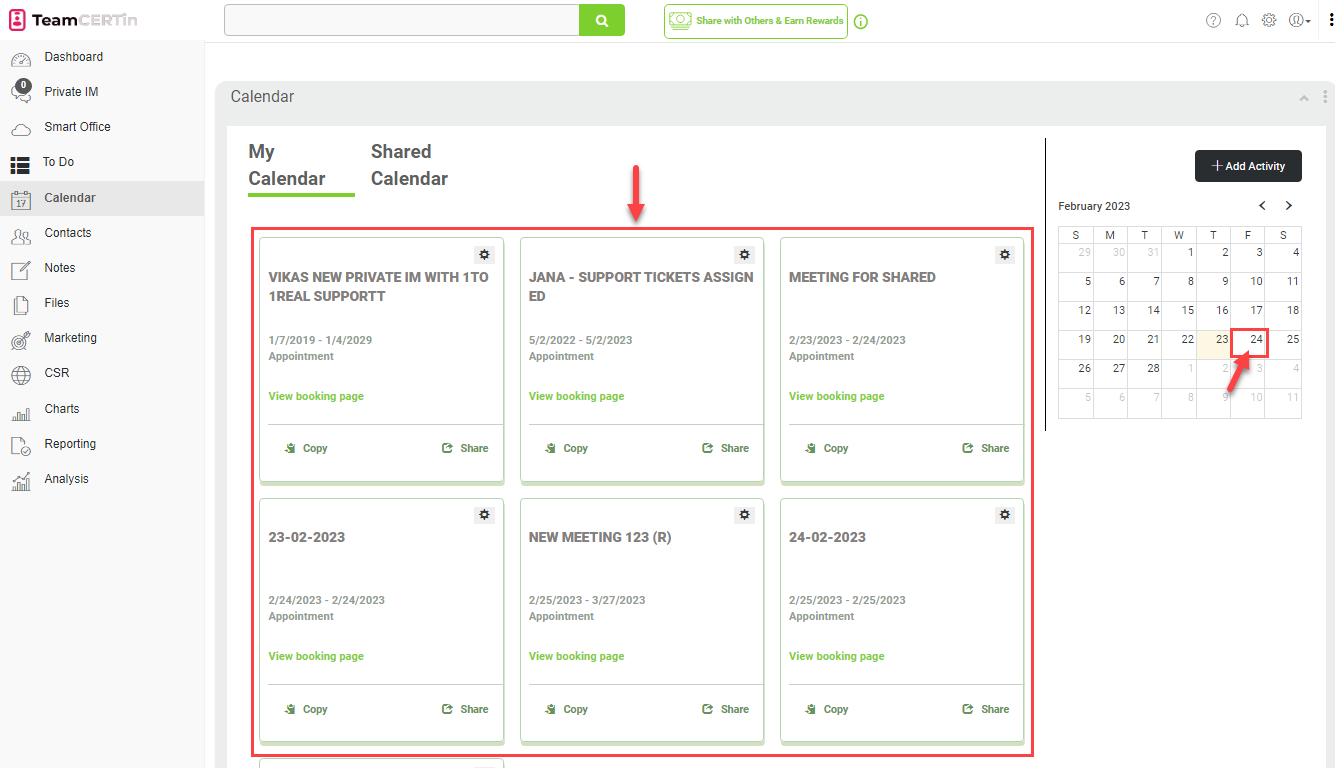
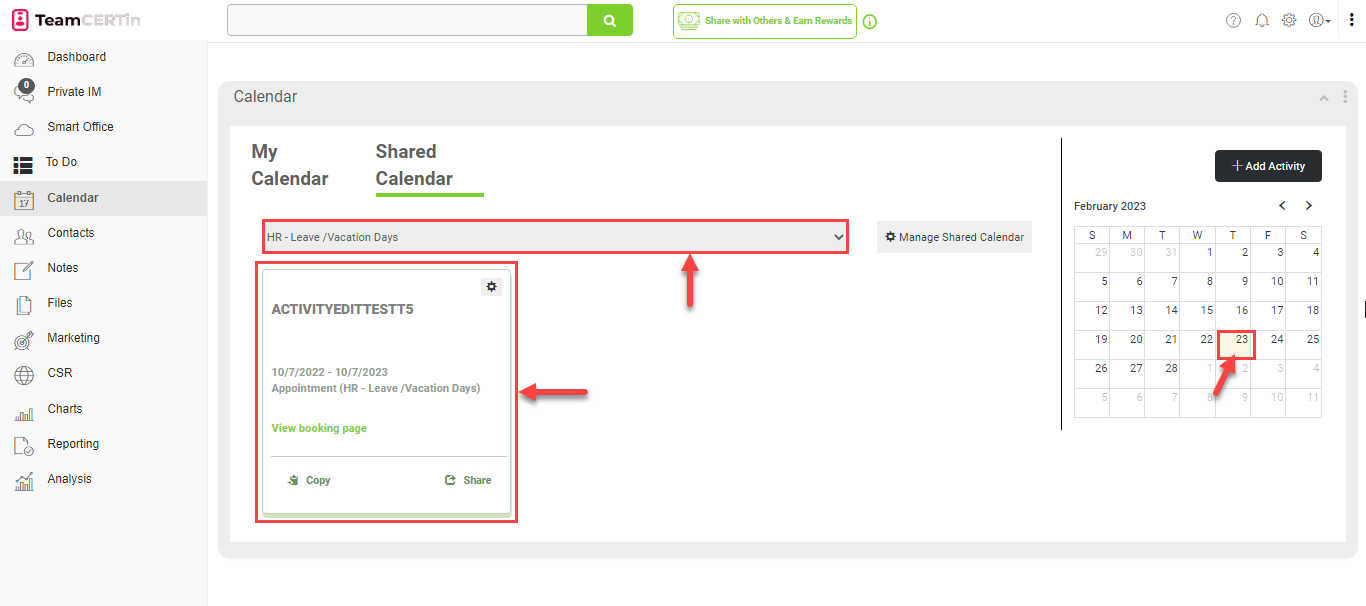
Shared Calendar Based on a Selected Date
By clicking on a date and/or selecting a task group from the dropdown list, you can easily view, list, or filter all the appointments, meetings, and events that are shared with you and scheduled for that day on the Shared Calendar tab.
Manage Availability
This section covers a range of important information including the different types of calendar views available, how to set or delete recurring availability, and other important features that you need to know about in order to make the most of your calendar gadget.
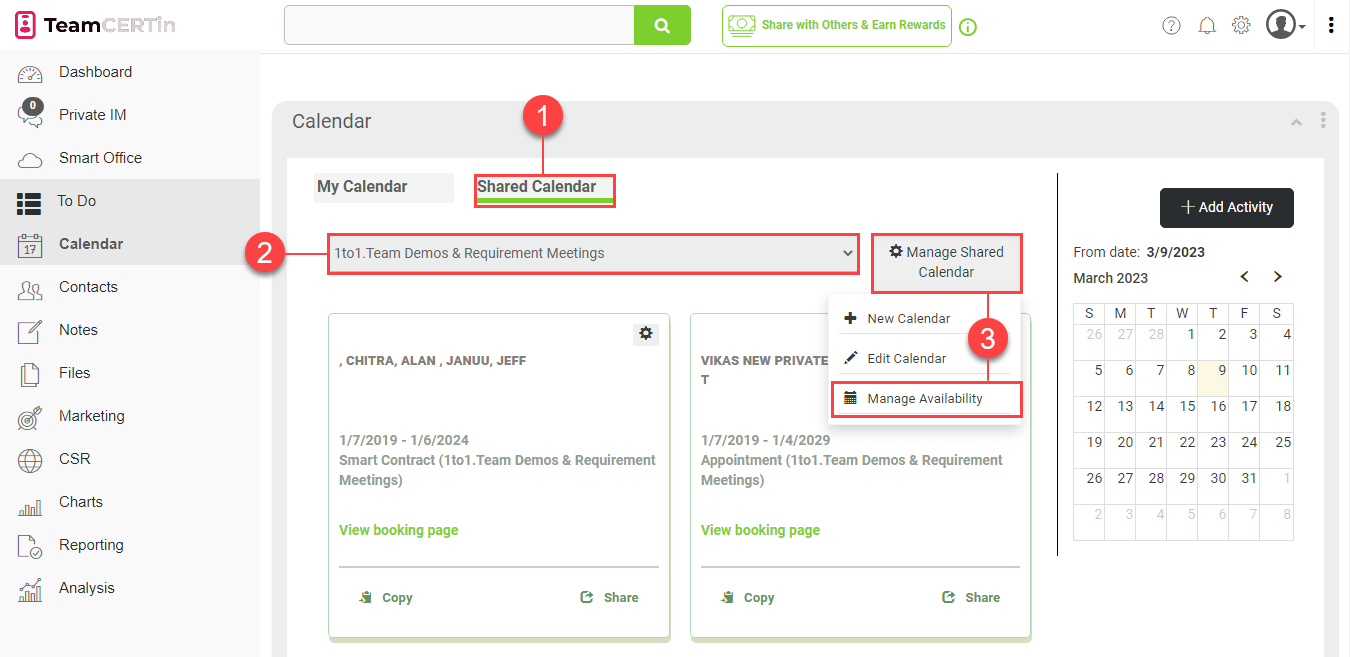
- To access the manage availability option, click on Shared Calendar.
- Choose the calendar you wish to edit from the dropdown list.
- Click Manage Shared Calendar and select Manage Availability.
- You have two options to view your calendar: List View and Calendar View. Click on any of the button based on your preference.
- List View
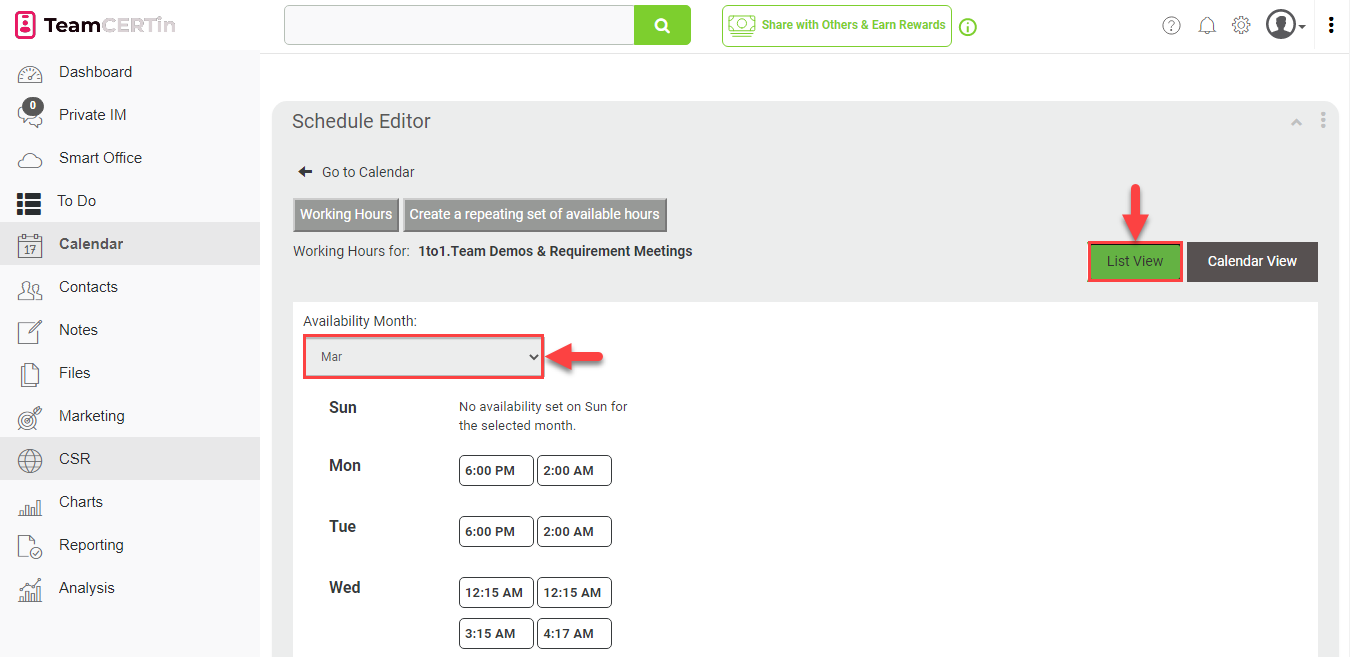
In List View, you can view your daily availability per month by clicking on the Availability Month dropdown list.
You can also set the month based on your preference by clicking on the month and pressing the up and down arrows.
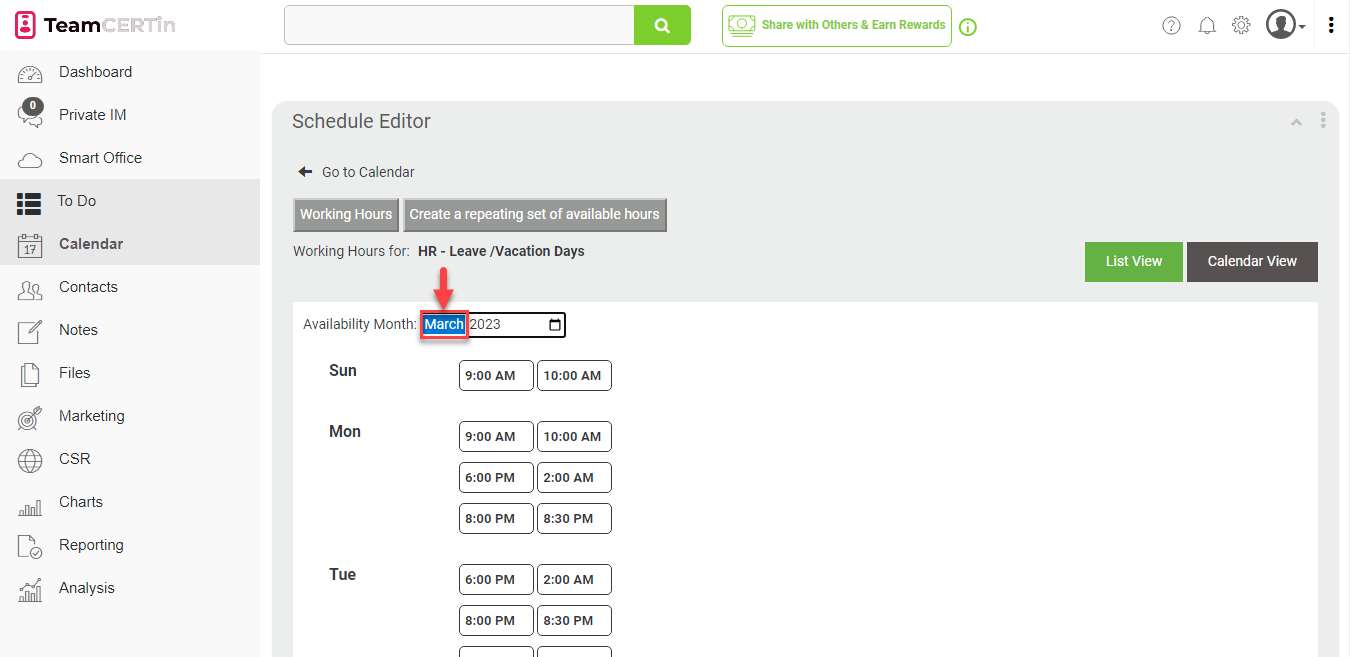
To go to your preferred year, click on the year. Then, you can either press the up and down arrows or type in the year you wish to view.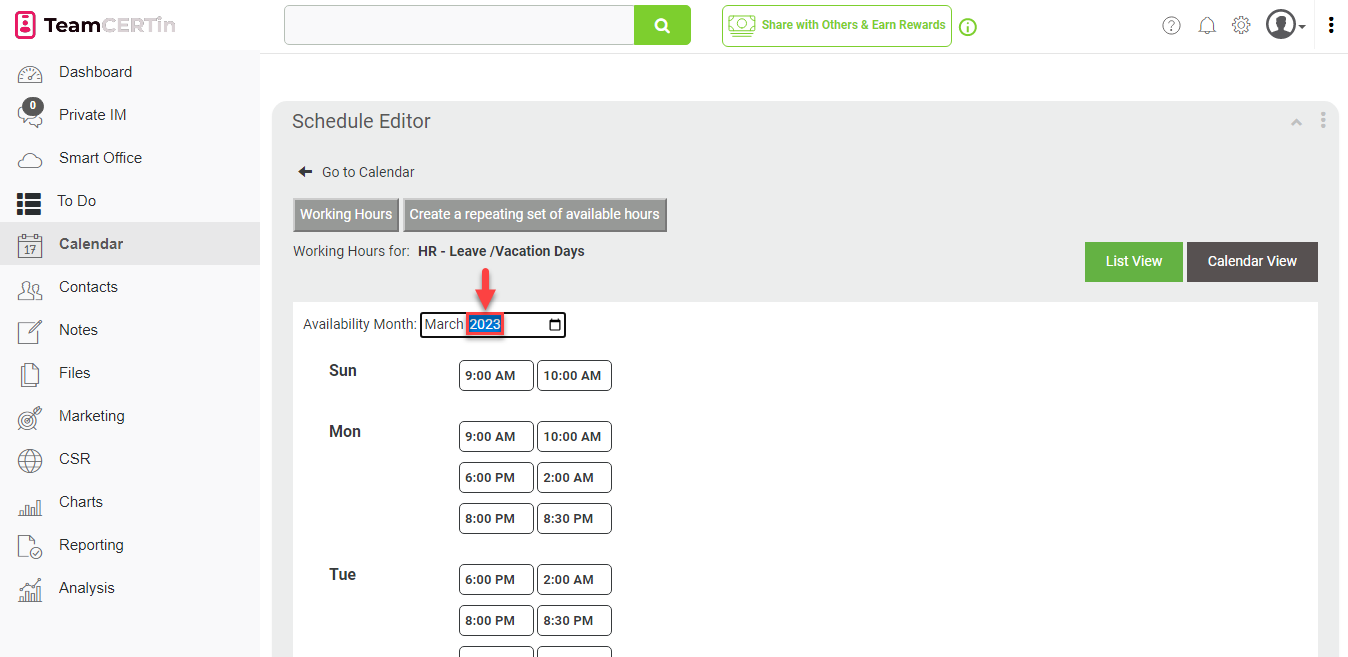
- Calendar View
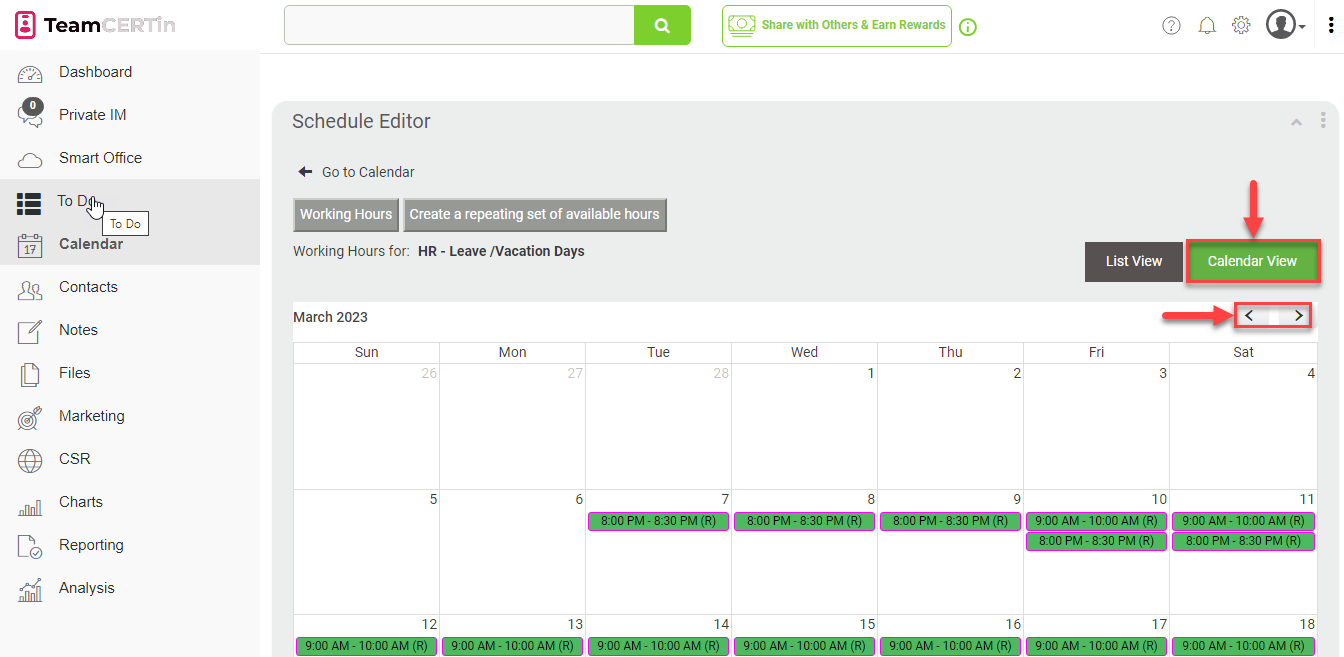
The Calendar View allows you to navigate the calendar by month by clicking on the navigation buttons in the upper-right corner.
In this view, events or tasks are typically arranged in rows or columns, corresponding to the days or weeks of a given time period. Each event is displayed as a block within the corresponding time slot, making it easy to see what events are scheduled for a particular day or week.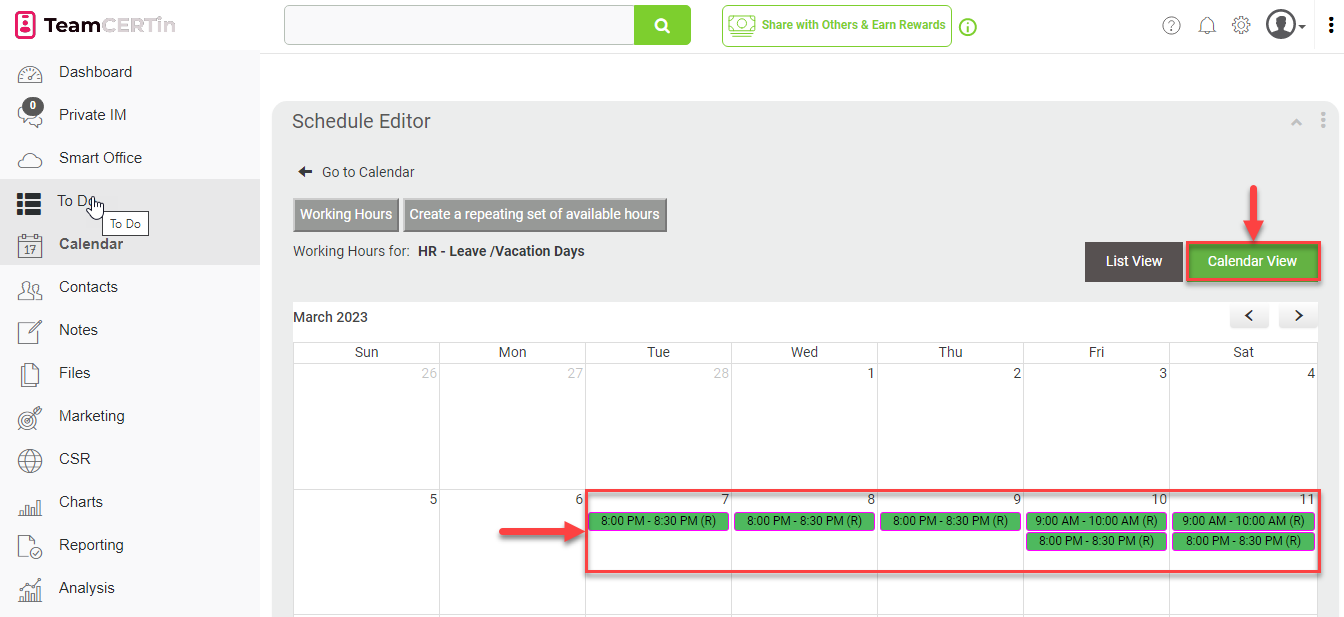
- List View
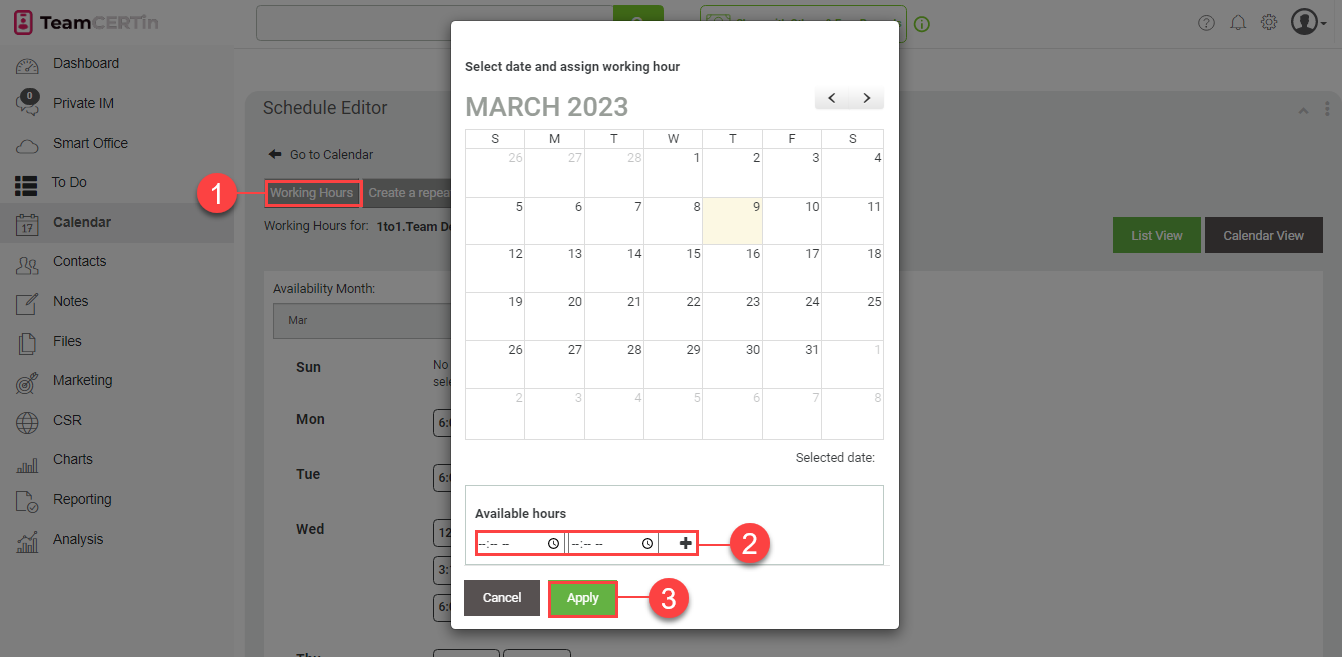
Set Working Hours Availability
- To set your working hours’ availability, click on the Working Hours button.
- Set the Available Hours. You can also click + to add more available hours.
- Once you’re done, click Apply.
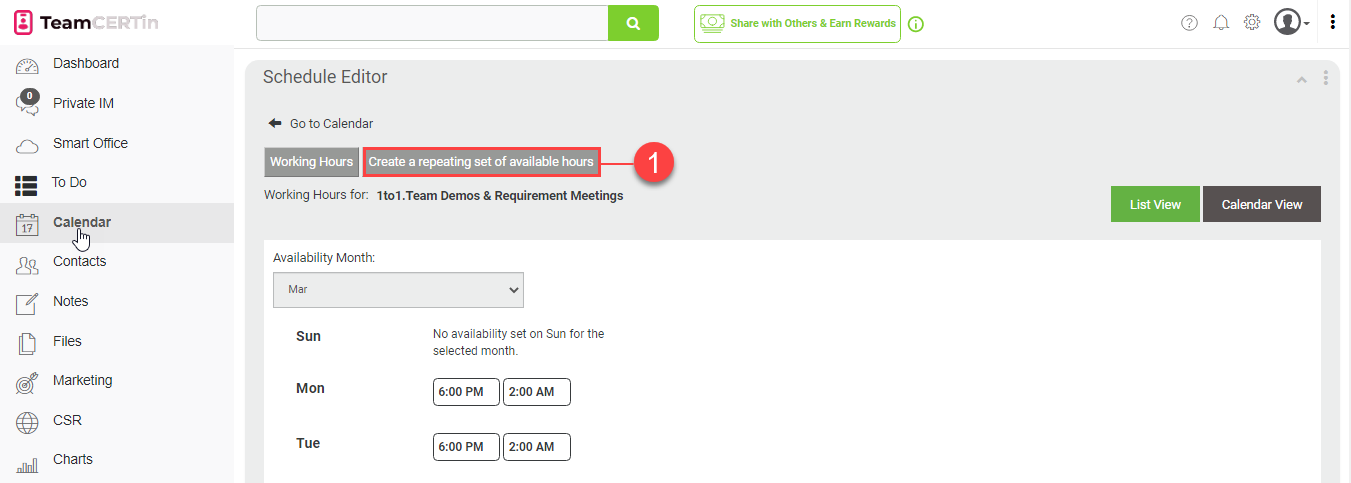
Set Recurring Availability
- To set a recurring availability, click on the ‘Create a repeating set of available hours’ button.
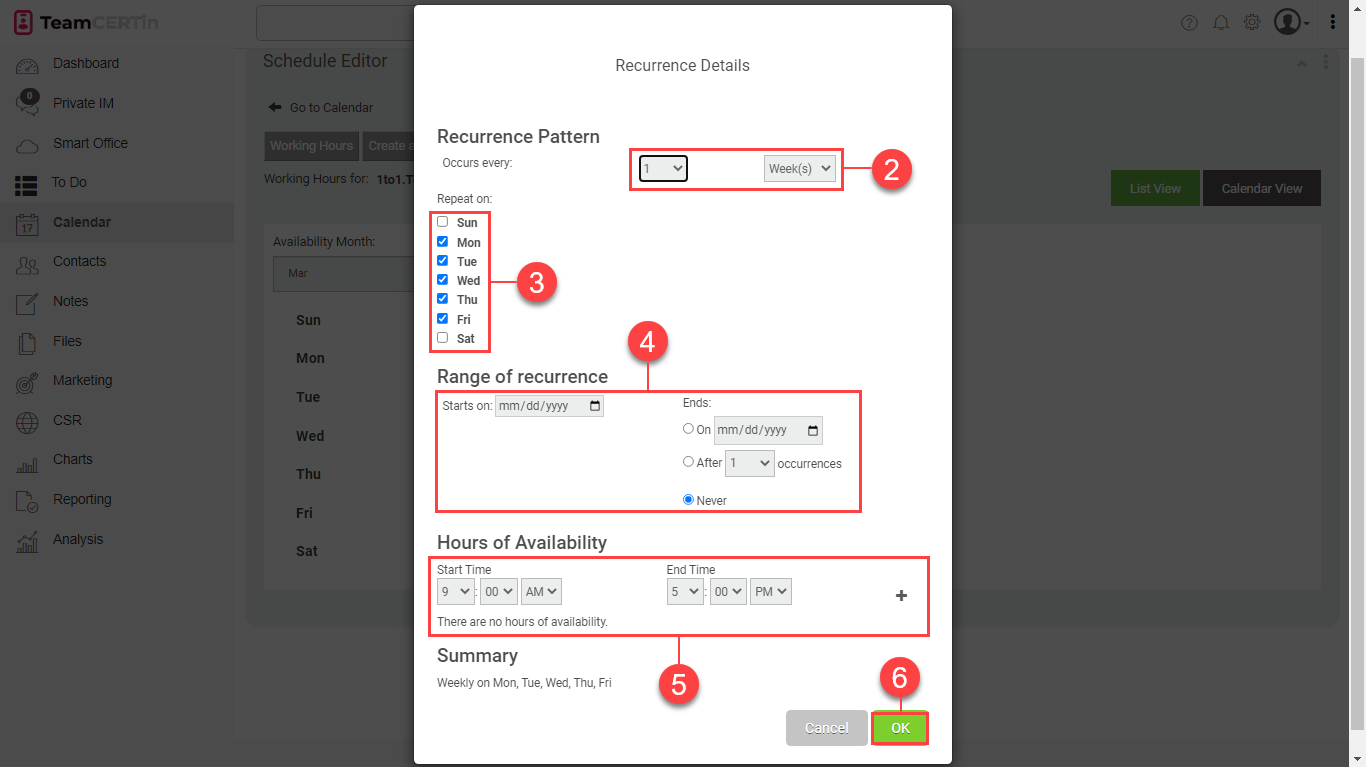
- Set your preferred recurrence pattern (e.g., once a week, etc.).
- Check or uncheck the days of your recurring availability.
- Set the start and end date of your availability.
- In the Hours of Availability section, you can set the start and end time. Click + to add more available hours.
- After doing all the settings, click OK.
Delete Availability
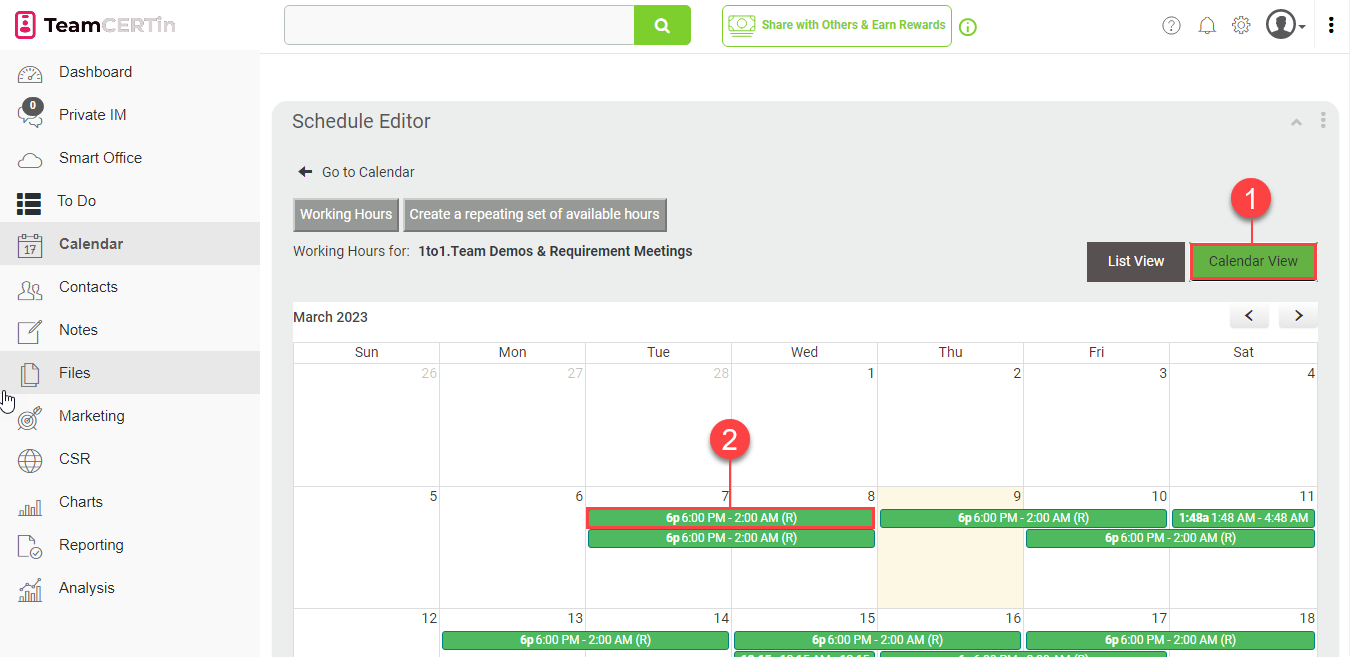
- To delete an availability, click on the Calendar View button.
- Choose the recurring availability you wish to delete on the calendar.
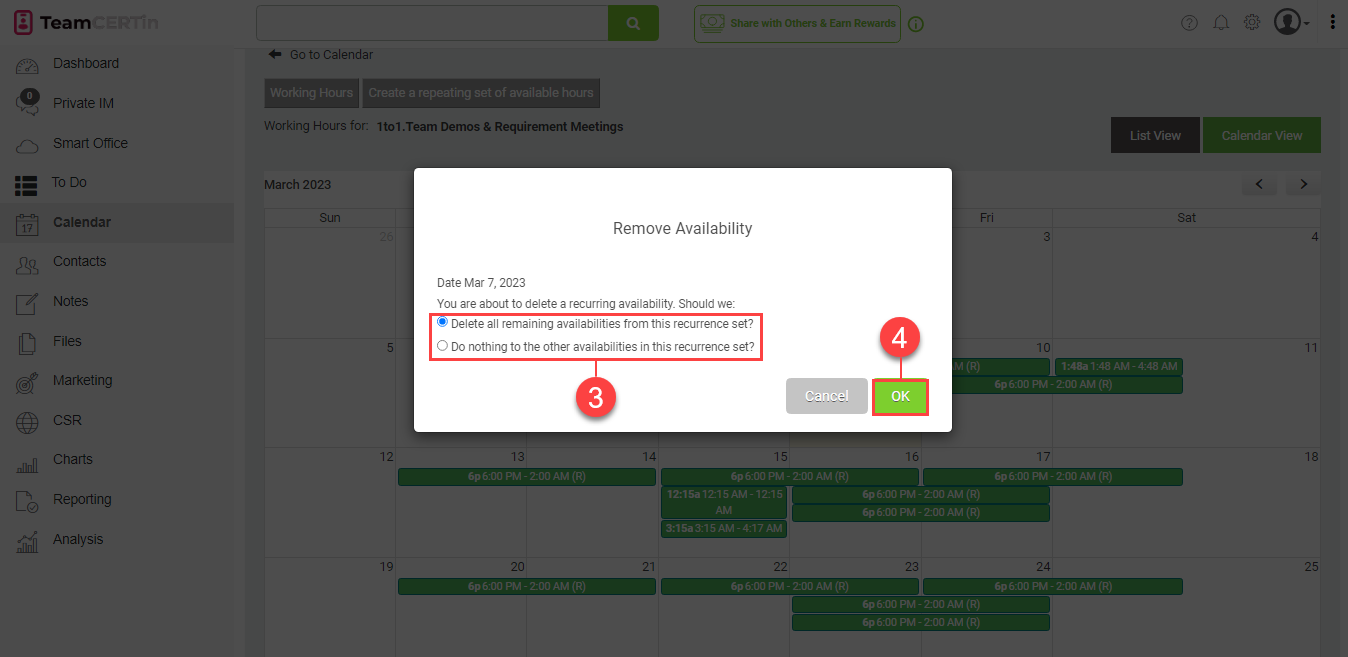
- Tick your preferred option between:
- Delete all remaining availabilities from this recurrence set?
- Do nothing to the other availabilities in this recurrence set?
- Click OK to proceed with the deletion.
Booking
This section provides a walk-through of the booking features of the Calendar gadget.
View Booking Page
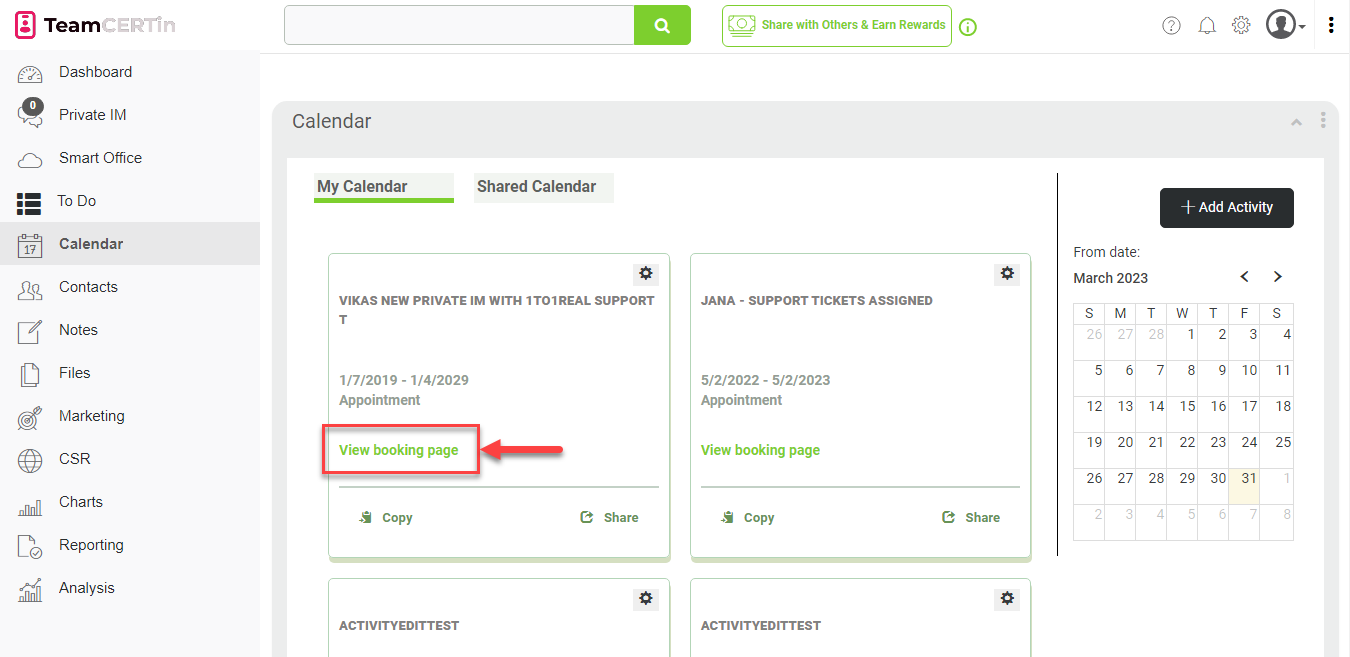
The View booking page feature allows you to preview the booking page that your invitees will see when they schedule a meeting with you. It shows your availability based on the options you have set up in your Calendar and also allows you to see how your booking page looks and functions, so you can make any necessary changes or updates before sharing it with your invitees.
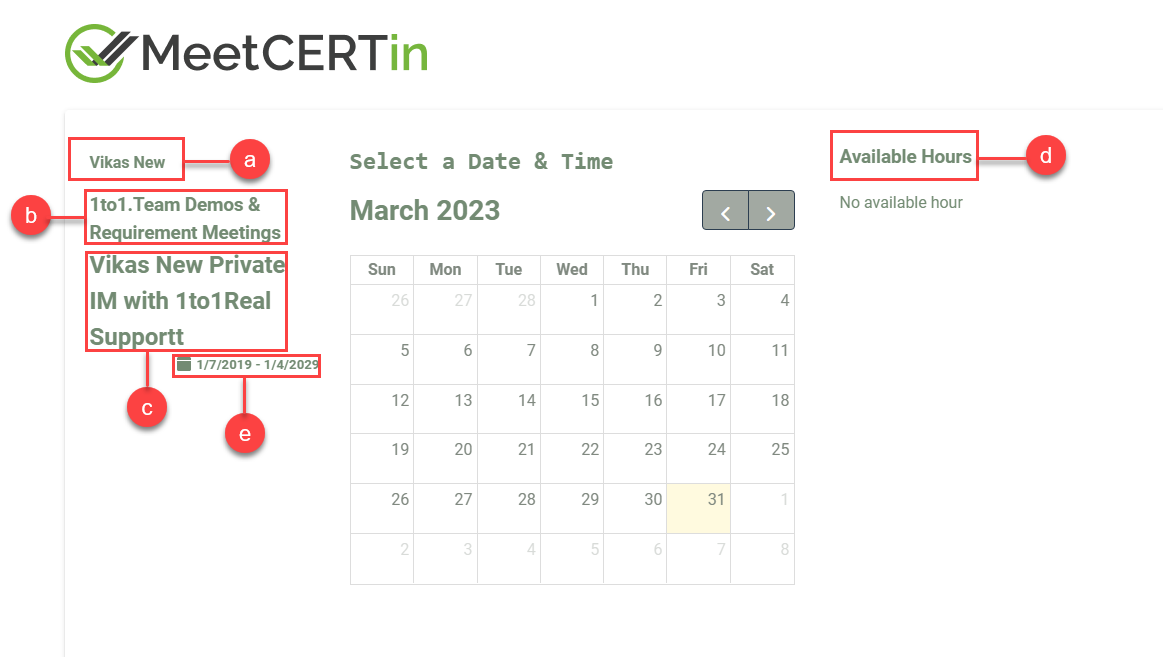
On the preview page, you can also see the following information:
- Host name
- Shared calendar name
- Activity name
- Availability
- Duration of the activity
Share
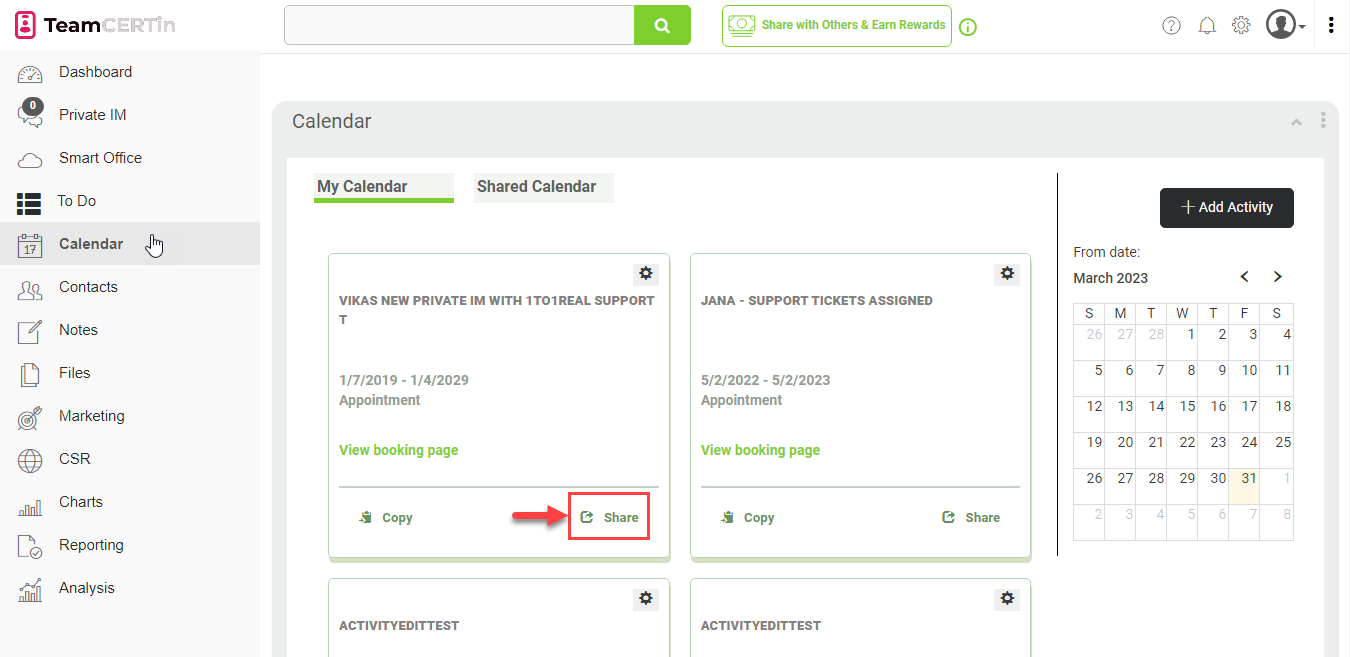
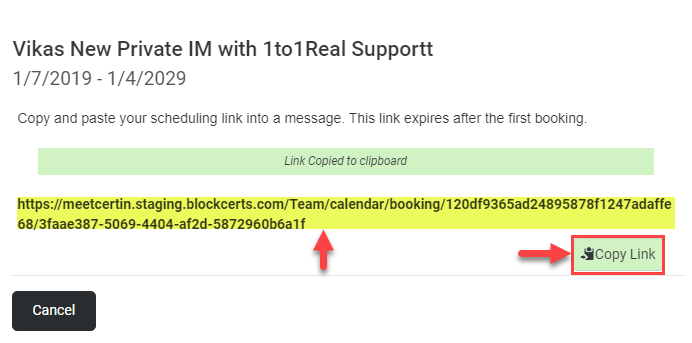
When you click on the Share button, it generates a unique link to your booking page that you can copy and share with others via email, messaging apps, social media, or any other platform. Click Copy Link to copy the generated link to the clipboard. This link will direct people to your booking page, where they can view your availability and schedule a meeting with you based on the options you have set up in your Calendar.
When a user clicks on that generated link, they will be redirected to the MeetCERTin booking page. For example, (a) if the user wishes to book an appointment on March 31st, (b) the Available Hours will be displayed and they can choose their desired time from the list of options. (c) The chosen date and time will be displayed on the screen. Once decided, (d) they are required to enter their First and Last Names. Finally, to confirm the booking, (e) the user needs to click on the Schedule Appointment button.
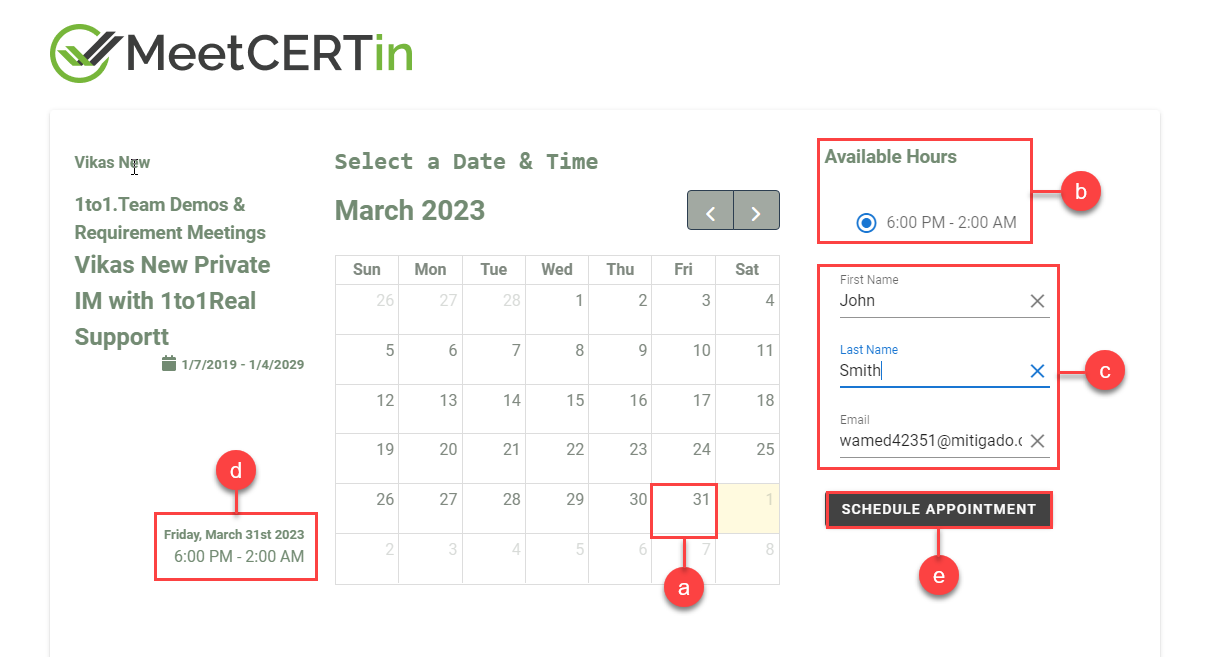
The confirmation message: "Your booking has been successfully submitted. Please check the confirmation email that has been sent. Thank you." will be displayed.
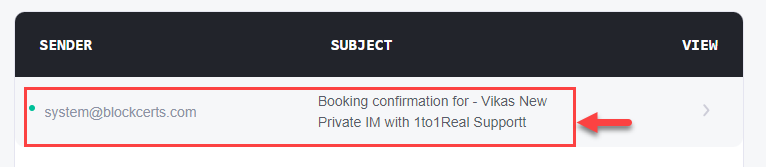
The user then checks their email for the booking confirmation.
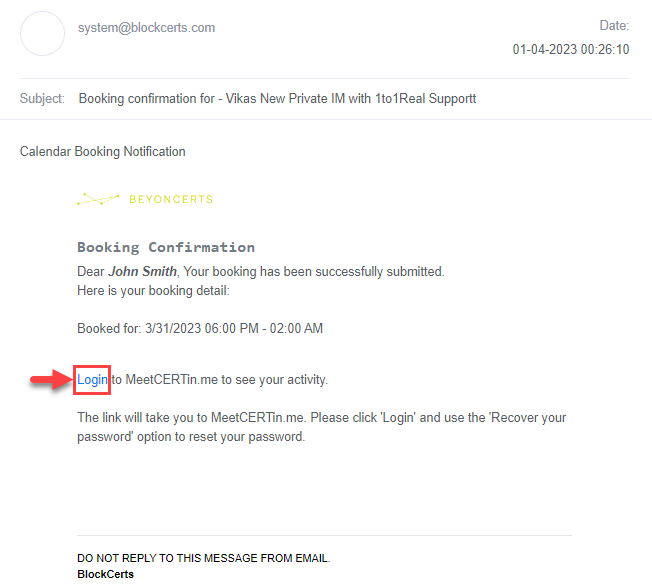
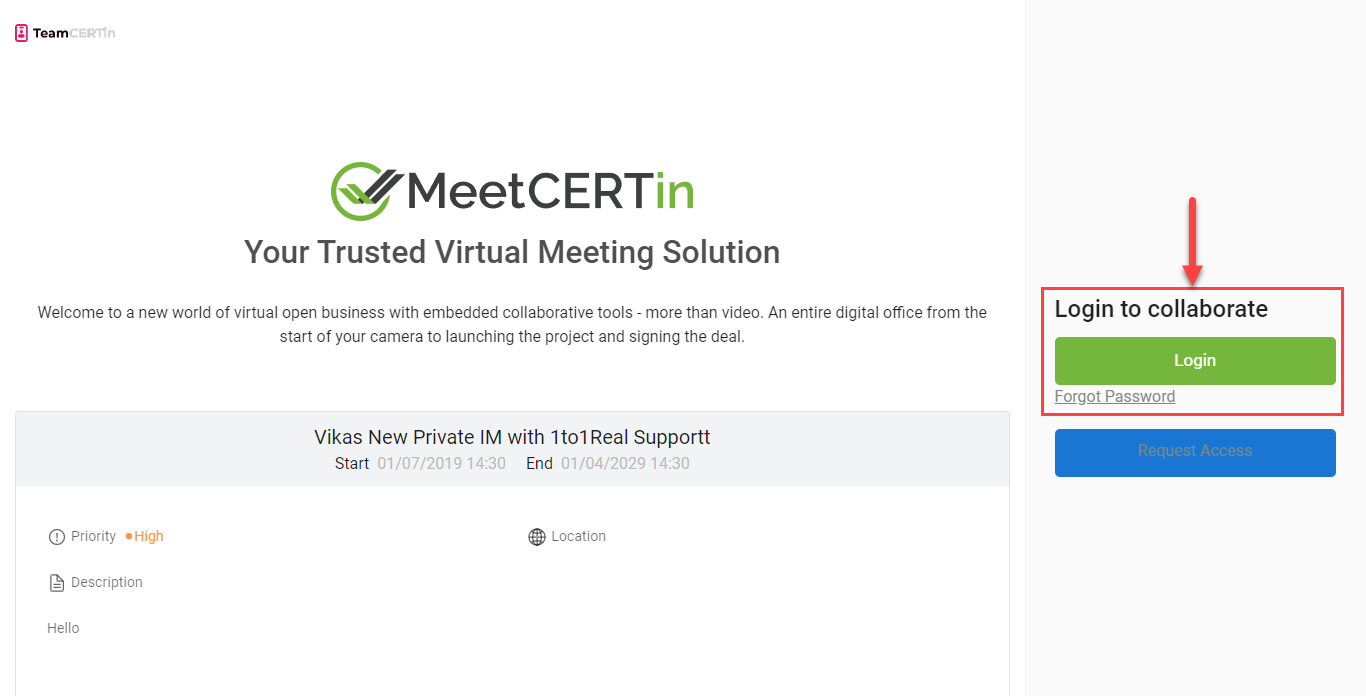
The email contains the details of the booking. To view your activity, click Login to sign in to MeetCERTin.me.
Copy
When you click on Copy, it will copy the booking preview link. Click OK to confirm.
