What are Contacts?

Contacts are your clients, employees, business partners, prospective employees, customers, suppliers, leads, and so on. They could be a contact from Outlook, a business card, your address book, a lead capture form, or another CRM program

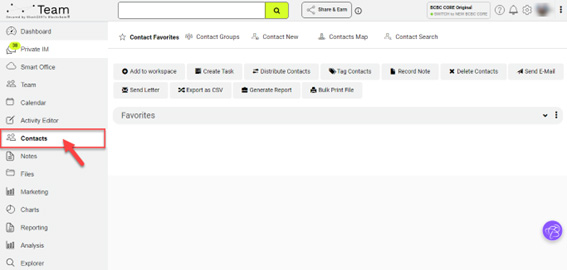
Using the Contacts menu option, you can navigate through your entire contact database. It also provides features to keep contacts organized so that you can keep your conversations going at a moment’s notice. You can select the contact from your “Favorite” or customized groups, as well as search for contacts and add new ones. Each contact also has a custom profile, through which you can access more information (such as additional email addresses, phone numbers, company, etc.) of the contact, make personalized notes about them and view the history of your conversations with that contact


How do I use them?

Once you have uploaded your contacts into BCERTin, they are stored there, allowing you to access contact information, note history, task account payments and file sharing. To bulk import your contacts please see the Importing Contacts Article


Creating Contacts


Select Contact New tab as shown in the above screen, to display a blank Contact Editor. Follow the steps below to use this screen to add additional individual Contacts to BCERTin


Tip: For lots of contacts, consider importing them. Please see our article on Importing Contacts for ways to save time when dealing with bulk contacts

Contact Editor

The Contact Editor has all the fields for creating / editing a contact. Fill in as much data as you can, it may come in handy later!


Projects: Every Contact must be placed in at least one Workspace. Which users can view the Contact depends on where you place the contact. Each company sets up their workspaces as per their particular needs.  Contact your System Administrator for information on how to use your Project Spaces within your organization's account.


Company: Contacts that share the same name in the Company field are linked together and can be easily found and worked with.


Category, Sub-Category and Source These three fields together called "Sources". They work together to categorize where the contact came from. Contact your system administrator for information about your instance's usage of Sources. The items in the dropdown menu for Sources can be added to by System Administrators

Example:

Category: Event

Sub-Category: Trade Show

Source: WPC 2011


Rank: A contact has only one Rank, but it can be changed as the status of the contact changes. Contact your System Administrator for information about your instance's usage of Ranks.

Phone Numbers, Email Addresses and Mailing Addresses: The type "Primary" is used when you want to send an email creator where at the least one email address should be marked as “primary” in the contact record. Click "Add" to create more contact records

Editing Contacts 

This article is about editing Contact Record information

Here you can edit contact information, designate them as a Favorite, associate them with Project Spaces, assign Tags, associate them with Process Flows, add Notes, create Activities, add Additional Information and upload Files with them.

You can have multiple Contacts open at once, with each open Contact being displayed on the Contacts menu bar. Having too many contacts and groups open at the same time can affect performance, so click the X to close tabs when no longer needed


At the top you have four options, Email (email the contact), Favourite (add them to favourites), Edit (edit the contact), and “x” (close the contact). Closing the contact does not delete them. Select icon as shown below to edit the contact in Contact Editor Refer Creating Contacts.


Favorite Contacts

BCERTin allows you to mark any of your contacts as a Favourite for quick access by clicking the star icon. Designating a contact as a Favourite will put it on your Contact Favorites tab.


Tagging Contacts

Tags are quick ways to mark contacts for future recall. You can “Search” for the tag or create a group that uses the tag to get a list you need. To access the tag gadget, edit the contact and go to Tags tab.


Start typing a tag name in the text box and BCERTin will look for similar already entered tags and provide you with a drop-down list and will allow you to select them. If no matches are found, just finish typing and click OK


Notes

You can add notes from the Contact Record using the text editor and by clicking


 Any Notes added here will be displayed within the History gadget of the contact record.


  1. Select the type of Note that you want to create from the Note Type list. Available options are Phone, Email and General.
  2. Use the text editor to put as little or as much formatting as you need.
  3. Click to finish


Group Contact Operations: Selecting Record Note from the menu displays the Record Bulk Note editor, which allows you to save a note to all selected contacts at once


Add Task

Check the box next to a Contact or Contact Group and select Create Task from the Contact Operations menu to display the Activity Editor with the contact already added as an Attendee.


Workspaces


Contacts that have clicked an "unsubscribe" link from one of your email campaigns will have a deselected workspace under "Subscribed".


Send an Email

Selecting the "Email" button will automatically start your email client application and create a blank email addressed to the contact


Process Flows

The Process Flow gadget groups open processes by workspace


Click on a workspace to expand the list. To start a new process, click the icon and select Add Process, or use the Contact Operations menu


Select a Process Type and name the process.  Enter an estimated closing value for the process and select a Workspace with which to associate the Process. Select an Owner then click OK to create a new process flow below Process Flows. Your System Administrator can help in understanding how your organization is using process flows


Note: Closing Value is the value of a closed deal. That is, if a prospective client is interested in a condominium valued at $500,000, then that is the closing value if the deal goes through. It is used for receivables pipeline reporting


Groups 

The My Lists gadget allows you to find a set of contacts based on specified filters.  Your Groups are saved so they can be reused and shared for easy collaboration with team members


Running the Group Search will bring up all the contacts that match your criteria


To Create a Group

  1. Select the Contact Lists sub-tab from the 'Contacts' tab


2. Select New Group. This will bring you to the Group Editor (displayed in the following screenshot below)


3. Enter a name for the group and select Lock Membership if you want the list to be static. Otherwise, every time you click "List Contacts", the group may find new contacts that match your filters and the list will update.

4. By default, Users will be excluded in the group. Otherwise, select "Include Users"

5. To populate your Group, select either the 'Match All Contacts' or 'Match Any Contacts'.

a. 'Match All Contacts' will list contacts who meet all of your filters.

b. 'Match Any Contact' will list contacts that meet one or more of the filters.

6. Click "Tag" to see a dropdown of all the choices.

7. Click the (+) button to use multiple criteria. Use (...) to create sub-criteria, or 'Nested' criteria.  The Tutorials section will have more use-cases for complex groups.

8. Set your search criteria and click Save


Viewing Group Contacts

Clicking a Group in the My Lists section will open the following menu:


Click Open Contacts to open the first Contact Record in the group. Contacts are automatically sorted by the "Last Modified" date of the contact, most recent first


Navigate through the Contacts within the Group by clicking Previous Contact or Next Contact.

To view all the contacts in your group, select List Contacts in the drop-down menu.


Edit a Group

Click 'Edit Group' and make your changes within the Group Editor

Click Save or Cancel to close the Group Editor without making any changes.


Sharing a Group

Select Share Group by clicking on a Group in My Lists

Type the name of the Users in Add Sharers bar.

Click Save to update your group or Cancel to close without retaining your modifications.


Deleting a Group

Click Delete Group. You will be asked to confirm.

Click OK to remove the Group from the system.