Creating Contacts
This article will guide you in creating contacts.
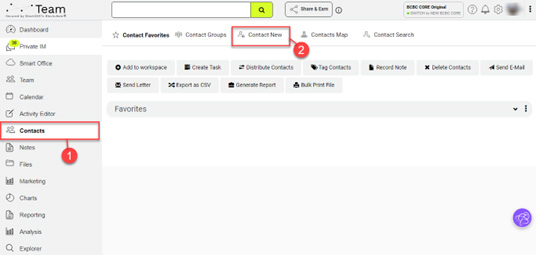
1. On the left-hand panel, select Contacts.
2. Click on the Contact New tab.
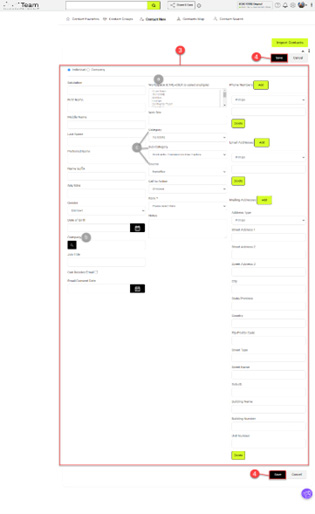
3. In the Contact Editor section, fill out all necessary information
4. Once you are finished, click Save.
Notes
a. Workspace: Every Contact must be placed in at least one “Workspace”. A user can view the Contact depending on where you place the contact. Each company sets up their project spaces as per their particular needs. Contact your System Administrator for information on how to use your workspaces within your organization's account.
b. Company: Contacts that share the same name in the company field are linked together and can be easily found and worked with.
c. Category, Sub-Category, and Source: These three fields together are called "Sources". They work together to categorize where the contact came from. Contact your system administrator for information about your instance's usage of Sources. The items in the dropdown menu for Sources can be added to by System Administrators.
- Example:
- Category: Event
Sub-Category: Trade Show
Source: WPC 2011
d. Rank: A contact has only one Rank, but it can be changed as the status of the contact changes. Contact your System Administrator for information about your instance's usage of Ranks.
e. Phone Numbers, Email Addresses, and Mailing Addresses: The type "Primary" is used when you want to send an email creator where at least one email address should be marked as “primary” in the contact record. Click Add to create more contact records.