Contact Groups
The Contact Groups gadget allows you to find a set of contacts based on specified filters. Your Groups are saved so they can be reused and shared for easy collaboration with team members.
Running the group search will bring up all the contracts that match your criteria.
Here are the steps in creating a group:
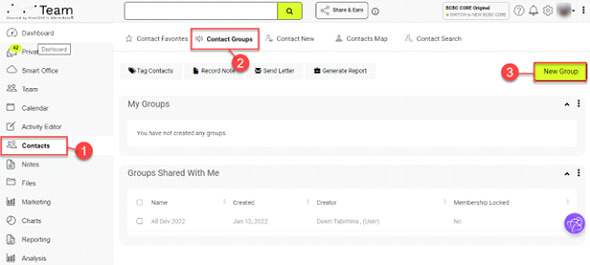
1. On the left-hand panel, select Contacts.
2. Click on the Contact Groups tab.
3. Click New Group.
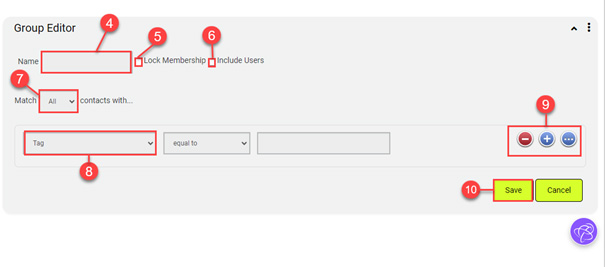
4. In the Group Editor section, enter a name for the group.
5. Tick the Lock Membership box if you want the list to be static. Otherwise, every time you click ‘List Contacts’, the group may find new contacts that match your filters, and the list will update.
6. By default, all users will be excluded from the group. Tick the Include Users box.
7. To populate your Group, select either ‘Match All Contacts’ or ‘Match Any Contacts’.
8. Click Tag to view all the choices in the drop-down list.
9. Click + to use multiple criteria. Otherwise, click – to remove other criteria. The … is used to create sub-criteria or nested criteria.
10. Set your search criteria and click Save.
Viewing Group Contacts
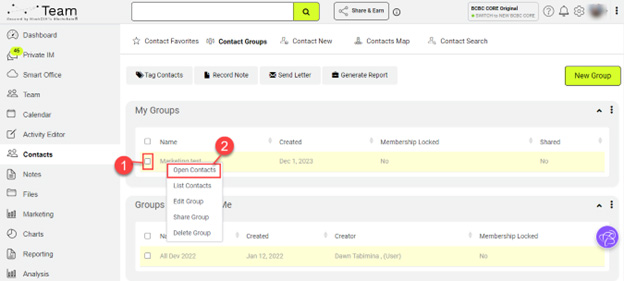
1. Select a group in the My Groups section.
2. A pop-up menu will appear. Select Open Contacts. This will display the contacts in the Browsing Group window.
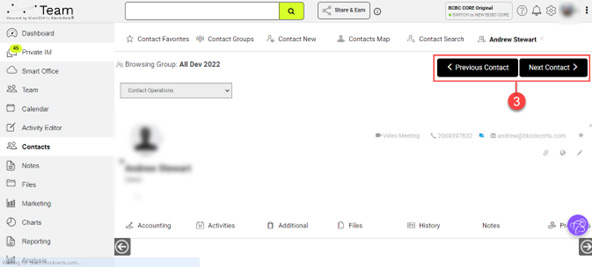
3. Navigate through the contacts with the group by clicking Previous Contact or Next Contact.
Notes
When you select a group in the My Groups section, these menu items will also be displayed:
- List Contacts displays all the contacts in the group.
- Edit Group enables you to make changes within the Group Editor.
- Share Group enables you to share a particular group with other users.
- Delete Group removes the group from the system.